Having a backup of your necessary data is always a good choice, but people don’t know the best places to backup your important data.
One of the best options I recommend is to use Google Drive to get unlimited storage and manage your account on all devices such as PC, iOS devices, and much more.
In this tutorial, you will see complete detail about syncing your data using Google Drive and Google Photos Automatically.
What Backup and sync actually are?
I hope you are aware of backup and data syncing but before proceeding, let us clearly define what backup and Sync are? Backup stores your all-important data in cloud storage which remains there, and new data automatically sync with your system and save there.
Something happens that you lose your essential data, but you can quickly restore a backup anytime.
Must see: Phishing: Protect yourself against Phishing Threats
How To Sync Google Drive to Desktop
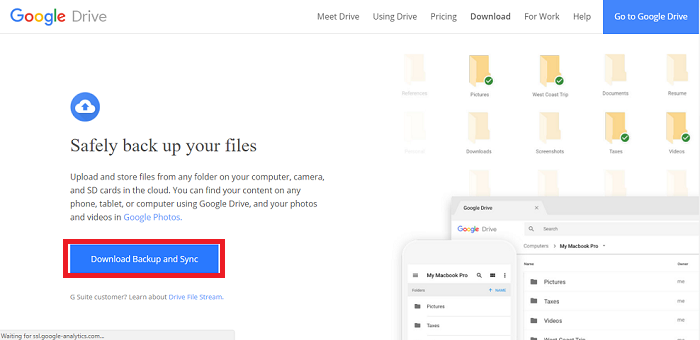
Step 1: Download and Install Backup and Sync- Free Cloud Storage
- Firstly you need to Download Backup and Sync.If you have downloaded Google Drive earlier then you need not have uninstalled Google Drive manually as new download automatically replaces Google Drive.
- Now launch the installer from download option of your browser. If you are using Google Chrome it may display at the bottom or otherwise see Downloads. Now Accept the option ”Do you want to allow this app to make changes to your PC?”
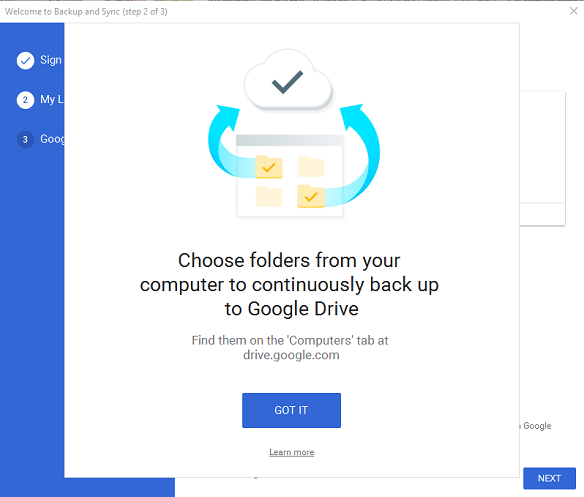
- Once you accept it completes downloading within few seconds. Open Backup and Sync once it gets downloaded. Log in with your Google account (if you have Google Drive already installed then it automatically log in with that account). After this select GOT IT to use this app.
Step 2: Choose the Files for Backup and Sync
Backup and Sync have two categories here.
- My Laptop
- Google Drive
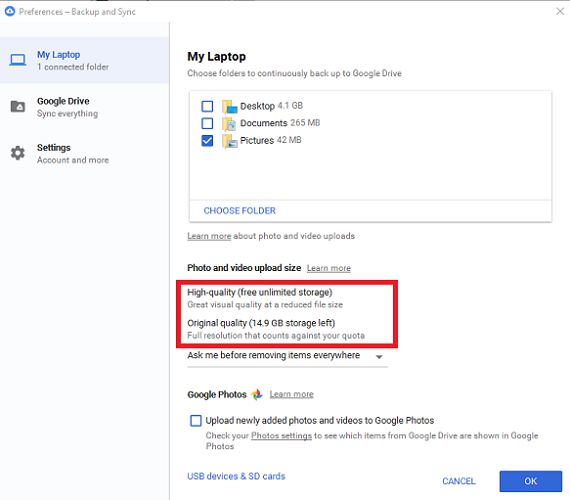
My Laptop Section
Here you can select the folder from your PC, some are already shown, like Desktop, Pictures, and Documents, but you can choose any folder by tapping on CHOOSE FOLDER.
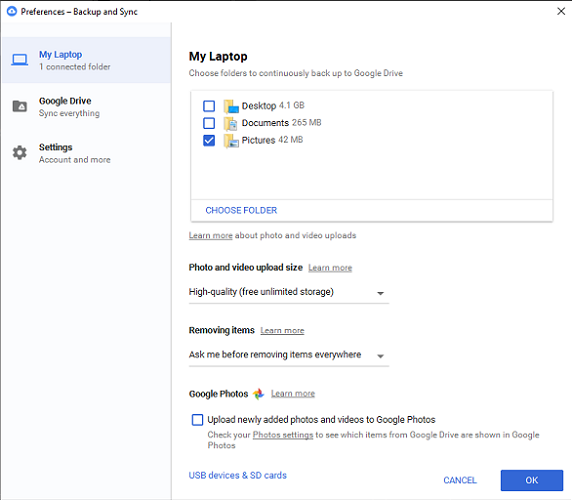
Hereunder the My Laptop category, you can modify your preference by choosing High-quality or Original quality depending upon your storage quantity. To access unlimited free storage, you have to choose High-quality (free unlimited storage); otherwise Original quality option gives you 15 GB for free.
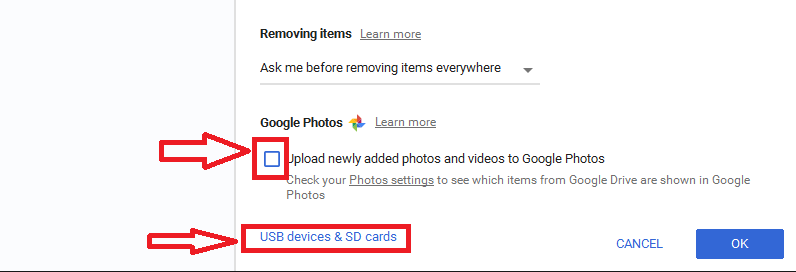
You can select the option Upload newly added photos and videos to Google Photos, automatically scanning your computer for new pictures and videos and adding them to Google Photos. Lastly, you can also upload photos and files from USB devices & SD cards.
NOTE: The files you choose to sync from outside your Drive folder will not show in the Drive displaying folders. To access them, you need to visit Google Drive.
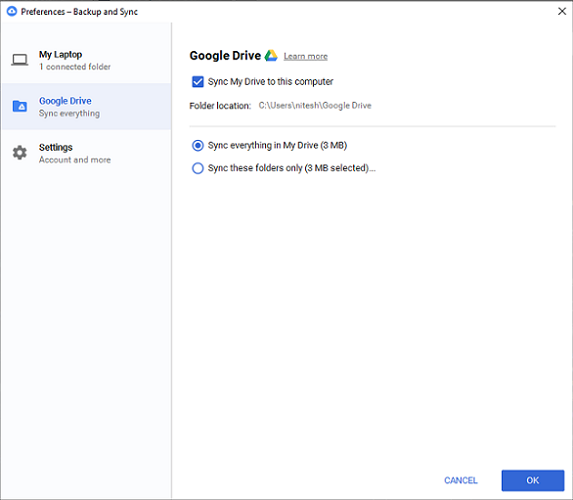
Google Drive Section
Here you see three options.
- Sync my Drive to this computer: You can enable/disable syncing your Google Drive with this PC. If you enable it then two more option will display.
- Sync everything in my Drive: Choose this option to sync everything you have with your Google Drive to this PC.
- Sync only these folders: Here you can manually choose the folder you want to sync with this PC.
Step 3: Some other additional Settings
Apart from choosing folders to upload manually, you can make settings anytime by going over the taskbar as long as this app runs and then selecting Preferences to customize settings.
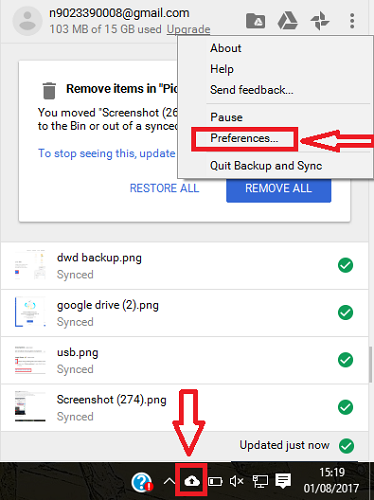
Here you can also stop this backup & Sync anytime by going to Quit Backup and Sync.
You can easily enable your Backup and Sync using Google Drive by following the above steps.
You may also like:
- Enhance Internet Speed. simple fixes to the frustrating problem
- 5 Top Tips for Staying Safe and Secure on Public Wi-Fi
- 6 Best Tips for Ransomware Attack Prevention
I hope you like this tutorial and quickly start a backup of all your important stuff using Google Drive and Google Photos.
Keep in touch with us for more helpful information on social media, Facebook, Twitter.
Thats great! Your article is more detailed and give more information than what i have read.