Laptop connected to WiFi but no internet access windows 10 is becoming a typical problem!
Windows 10 users who have a PC with Windows installed and connected to the Internet but display a notice that the Internet is not safe are in the proper spot.
There are many reasons for this having no internet connection and limited internet connection.
Change your IP and DNS address and run Windows Network Diagnostics to repair this issue. Protocol characteristics establish the automated IP and DNS addresses on the Internet.
Won’t connect to the internet. This guide will show you how to solve a WiFi problem using all of the available ways.
Is it Useless to Be Connected When There Is No Internet?
Before we go any further, it’s important to understand what happens to your network while you’re using Wi-Fi but not online. In order to accomplish so, the fundamentals of home networking must be explained.
Your router serves as a wireless access point for devices like laptops. It is the router’s job to manage all of the network connections in your house. The modem, which connects your home network to the internet, is where your router is plugged in.
Getting a connection to the internet is impossible if your router isn’t operating or if you receive an error message like “Connected but no Internet Access” or anything similar appears on your computer’s screen. If you see messages like “Not connected,” “No Internet,” or “No Internet connection,” your router isn’t connected to the Internet.
As you’ll see in a moment, this provides you a hint as to what the problem is.
What causes the “no internet secured” error message?
The fact that you have an online connection to your PC does not always mean that you have internet security. Your internet and wifi settings may have changed. Driver Easy can also fix Windows PC drivers. It’s the simplest. Modify the DNS server or the LAN settings. If you don’t use a proxy server to access the internet, you may be encountering problems because of:
- Antivirus and virtual private networks (VPNs) may prevent the DESlock+ software from accessing the internet.
- It’s possible that your PC’s Internet connection has broken down.
- The incorrect entry of the IP and DNS server location.
must see:
Fix No Internet Secured message in Windows 10
1. Check IP and DNS server address
Assign IP and DNS server addresses to auto-discovery. To do so, follow the instructions below. For this, you have to follow the below steps.
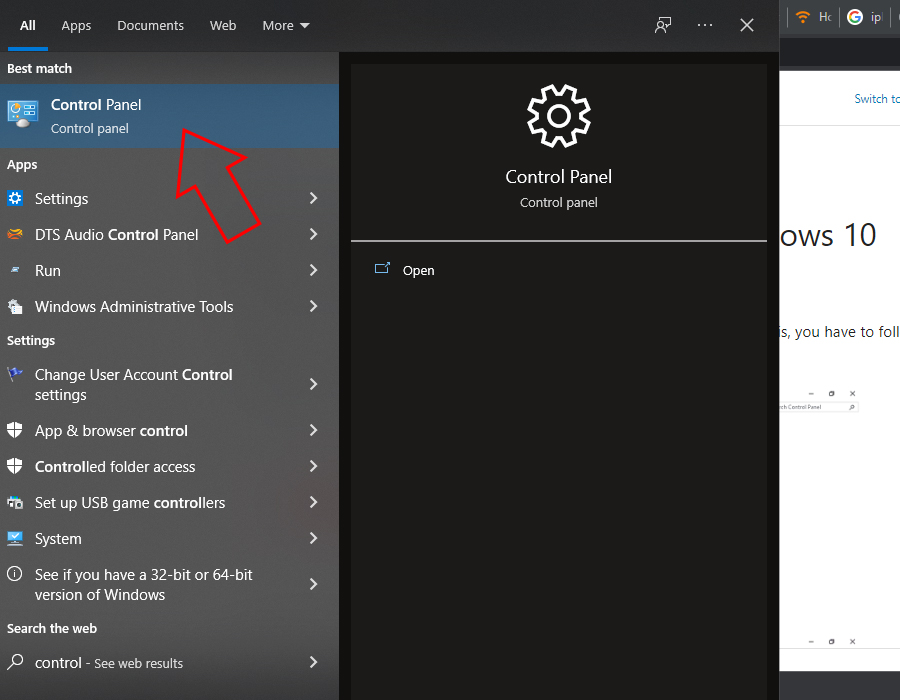
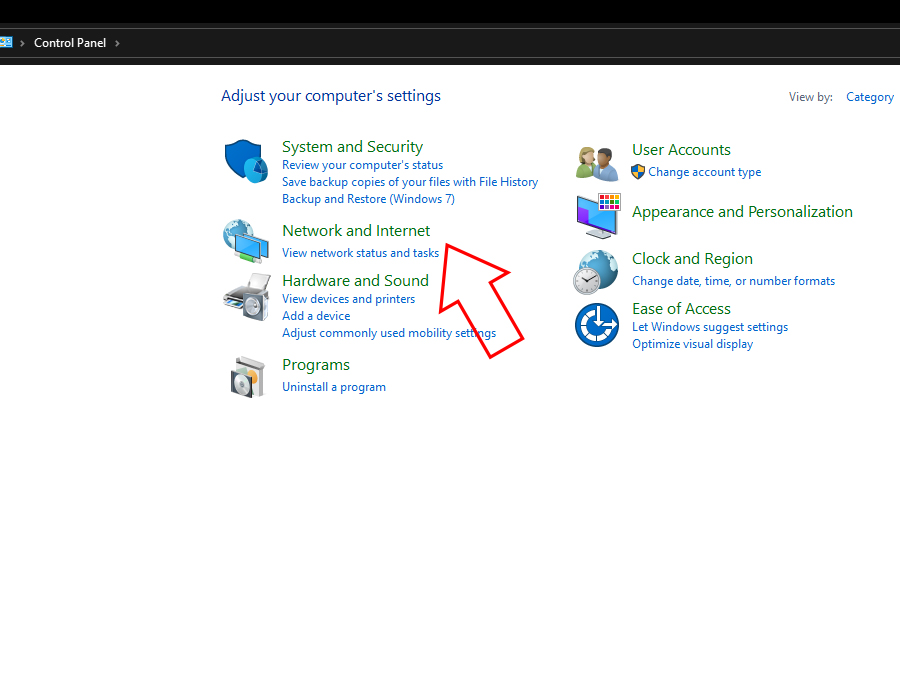
- Select Network and Sharing Center from the Control Panel menu.
- Once you’ve done so, click on “View Network Status and Tasks.”
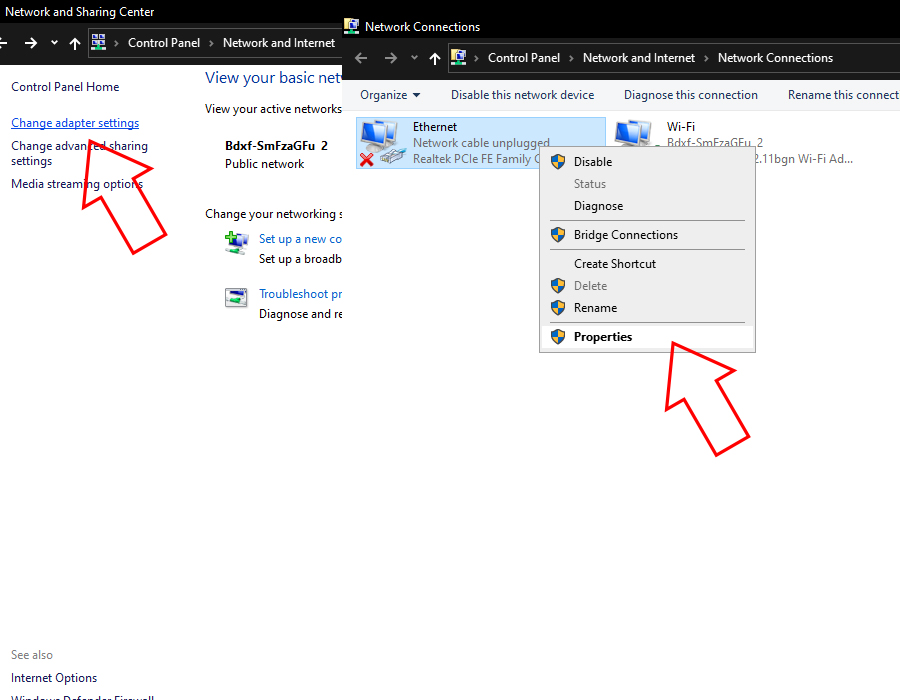
- Selecting the option to alter adapter settings will bring up a list of all the networks you’re connected to.
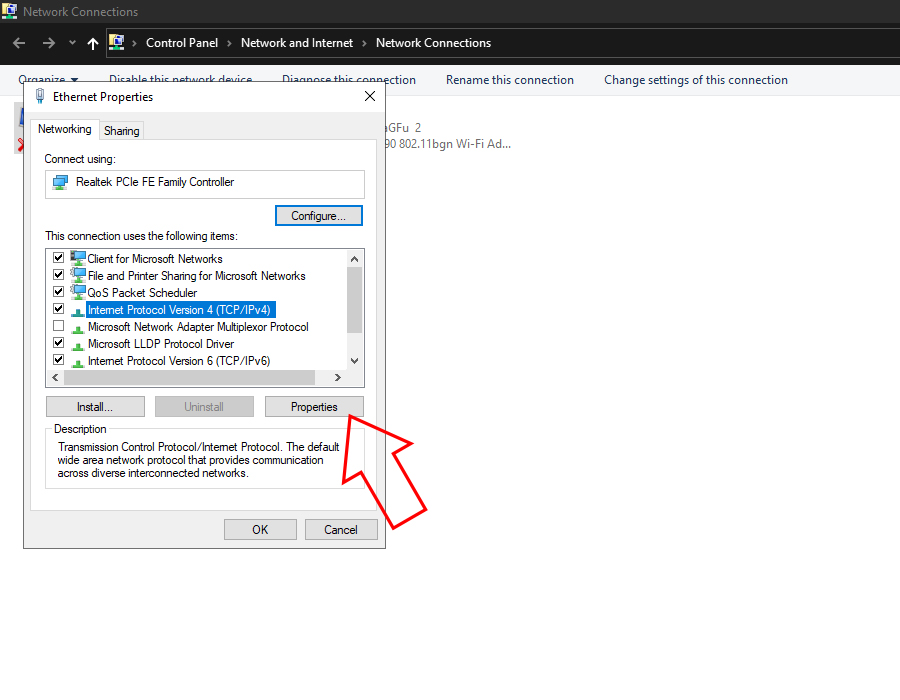
- Please right-click on the WiFi icon and select its properties, as shown in the above screenshot.
- Scroll down and go to Internet Protocol version 4 (TCP/IPv4). Please select it and go to its properties.
- Now select Obtain an IP address automatically and Obtain DNS server address automatically.
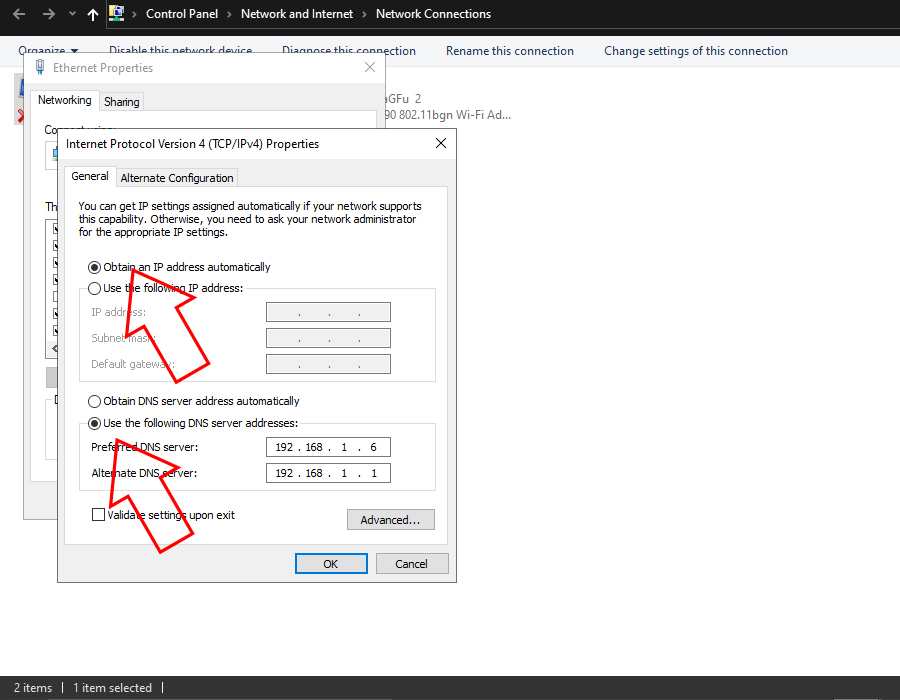
Now recheck your internet browser hope it starts working correctly or sees another method.
Use the Windows Network Diagnostics tool
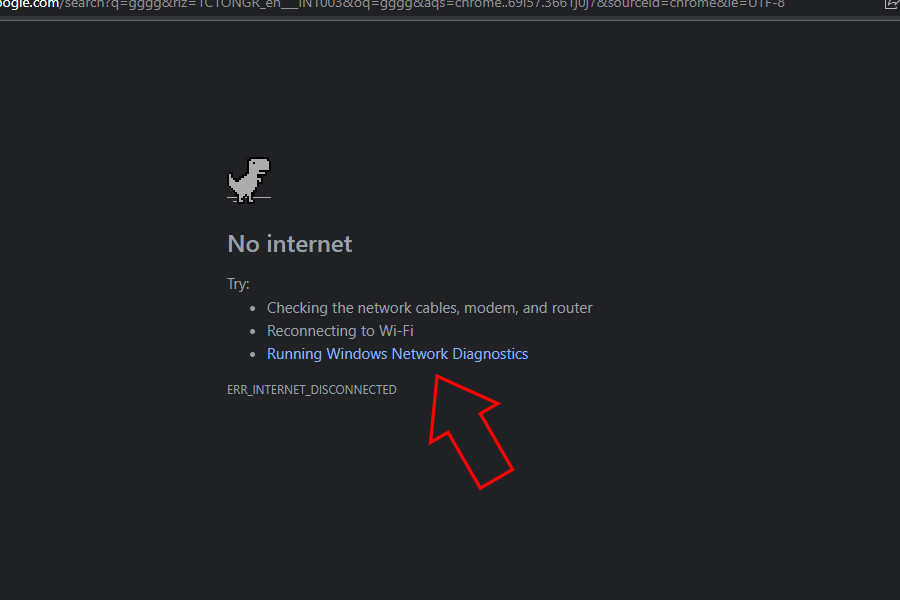
- If you are using the Google Chrome Browser, the page automatically shows no internet connection. If you are not using Google Chrome, go to Control Panel> Network and Sharing Centre> Troubleshoot Problems. And you can try running Windows Network Diagnostics.
- After completing Windows Network Diagnostics, troubleshooting completes and displays the problem found. It will automatically detect the internet problem and resolve it. Fix those problems, and you may also go for Explore additional options.
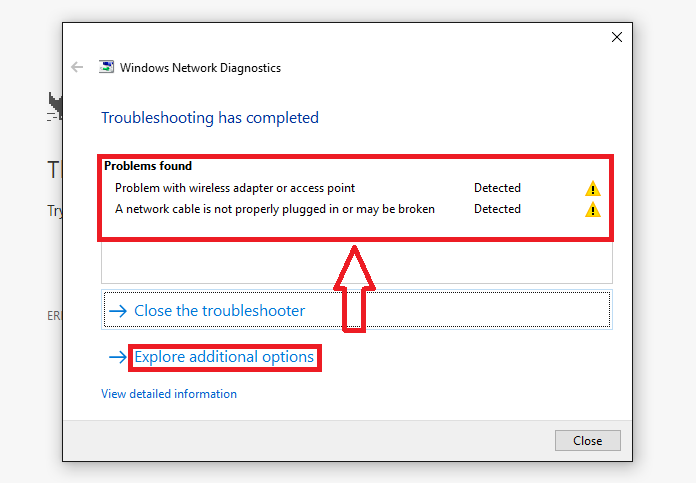
You may solve your problem; otherwise, check the below option.
Uninstall security tools
- If you are using any antivirus, uninstall it, check your Internet status, and reinstall that antivirus.
- Turn off the Firewall of your PC and check your internet status.
- Uninstall VPN if you are using any VPN service. Try internet access now.
We hope you find the solution among these three ways. If you have an alternate solution, do let us know in the comment section, it will be helpful for our readers.
Update Drivers
If nothing comes out, I recommend you update drivers using one of the leading Driver Updater software, i.e. Driver Easy Pro.
This updater scans your PC and shows where exactly the error exists, and with a single click, you can quickly fix the issue.
Final Comments
This will probably solve your problem, but it still appears then you have to update your internet-related drivers.
You may also like
By this tutorial, I hope you find this helpful tutorial about no internet secured message in windows 10 WiFi problem.
For the latest tech tutorial and software deals, you can follow us on Facebook Twitter.
Nice article. This actually what is happening with my laptop using windows 10. I hope I can fix it with this tutorial.
1st step works well.
Solved my problem. Thanks.
This really helps.thank you enough.