We have a solution for you if you want to move data across mobile devices and desktop computers. If you’re going to transfer data between your Windows PC and mobile device rapidly, you should use SHAREit.
SHAREit is one of the best ways to do it. This article will teach you how to transfer files between a computer and a mobile device using SHAREit on a PC.
Without the need for a USB cable or the internet, SHAREit can do anything. An internet connection is required to download SHAREit for PCs and SHAREit for smartphones.
SHAREit utilizes a WiFi hotspot to share files. Consequently, it transmits data considerably more quickly than Bluetooth ever could have. SHAREit conveyed a 300 MB file in 70 seconds. Using ShareIt, two Android smartphones may share data and applications.
On a desktop PC, SHAREit requires a WiFi LAN card or WiFi adapter to connect to the Internet. There is no need for any extra hardware with a laptop.
It is possible to use SHAREit on an Android, iPhone, or Windows phone. Move files from your Android, iPhone, or Windows Phone to your Microsoft Windows PC.
How to Transfer Files to and from an iPhone using SHAREit on a PC
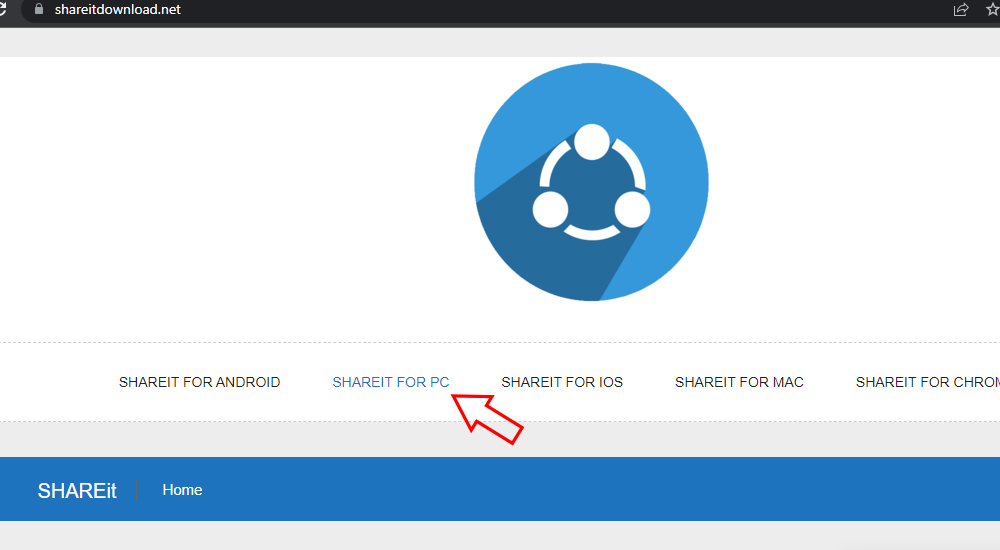
On a Windows PC, install SHAREit.
To use SHAREit, you must first download and install it on your computer. You can choose between Windows 7 and Windows 8.1, Windows 10, and Windows 11
You may download and install the setup on your PC. Shortcuts will be created on your desktop when this software is installed on your PC.
When you launch SHAREit, you’ll be presented with a list of helpful hints. In the meantime, Mark has not shown up.
Settings can be found by clicking on the screen’s parallel line icon at the top right. You may include both your primary and sophisticated setups in this section.
Under basic, you may change the name of your PC that is shown to other devices; underdeveloped; you can provide a location for the files or folders you receive.
After that, choose “Save” to finish the process.
Related
The process of setting up SHAREit on an iOS device
You can easily download SHAREit on any iOS device, including iPad and iPhone, through the App Store.
Before attempting to transmit or receive files, double-check that your iOS device and Windows PC are running the same version of SHAREit. You may need to upgrade your SHAREit software if you don’t see this message.
Transfer files from iOS to PC
STEP 1: Open SHAREit on your iOS device, and you will see a screen having Send and Receive options. Click on Send option.
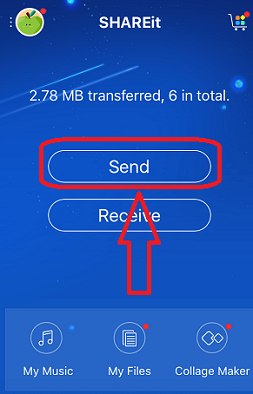
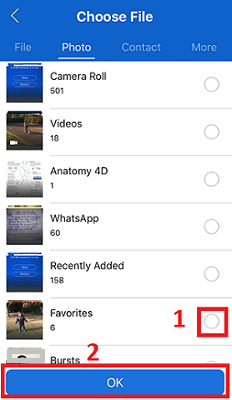
STEP 2: Choose Photo, Contact, and File you want to transfer to your Windows PC. Select OK.
NOTE: Without creating a hotspot, you cannot send a file to your Windows PC.
STEP 3: After connecting to the hotspot, select your PC name on your iOS device and accept it.
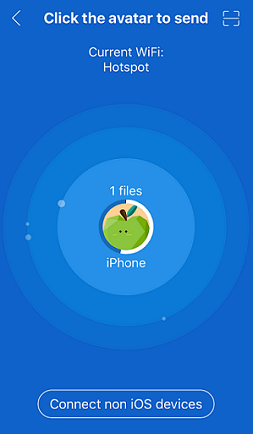
It automatically transfers and saves that Photo, Folder on your PC.
Transferring files between PC and iOS
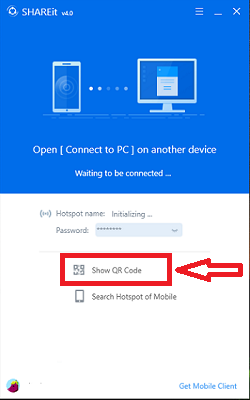
STEP 1: SHAREit should now be open on your PC. You’ll see two choices for connecting your phone or iPad here. You may select to display a QR code. You may either show the QR code or the mobile’s hotspot.
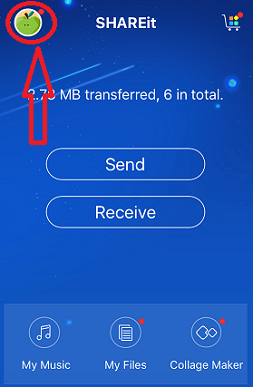
STEP 2: Go to your iOS device and select the top picture icon on the left.
STEP 3: Now choose the Connect PC/MAC option
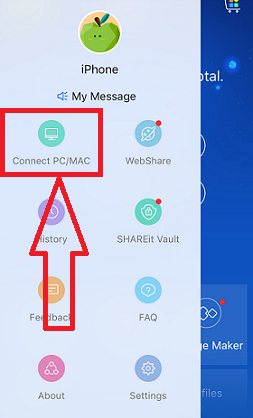
STEP 4: The next choice is Scan to Connect, which is the default. Hold that in front of your PC screen where the QR Code is shown.

STEP 5: After scanning, select the Photo, Folder you want to transfer and open that Photo, Folder, and you automatically receive it on your iOS device.
You can quickly transfer files and data from your phone to your PC through these steps.
Another option
To swiftly transfer data from your smartphone to your PC, use the shareware iMobie AnyTrans.
This software is a paid version, but it’s worth the money. It also has a lot of features for managing your smartphone’s storage.
You may also like
- How to prevent yourself from becoming a victim of a Ransomware attack
- Speed up Internet speed in minutes. Easy solution
- Phishing: Protect yourself against Phishing Attacks
We hope this guide demonstrates how to utilize SHAREit PC to swiftly move files between your iOS device and a PC or from an iPhone to a PC.
You can follow us for more technical stuff on Facebook and Twitter.