Attached Hard Drive to the Windows PC and still not locating on disk management? Usually, this happens when your hard drive is corrupted/ outdated and Windows refuses to show this. But, we have some tricks by which you can easily fix this issue.
Here we are going to discuss the fixing problem on your Windows and also by other third-party tools. Using third-party tools makes your work easier but are paid. Firstly we recommend you to make some changes on your PC and if problem is not solved then use third-party tools.
Recommended: 10 best professional data recovery software
Factors for not showing up Hard Drive in Disk Management
- Hard Drive is outdated
- Corrupted hard drive
- Virus attack
- Improper allocations/ attachments
- More…
Fix: External Hard Drive not Showing up in Disk Management
Here we are going to list some of the best ways
1.Check your Hard Drive is connected and Online
- Open Run command on your PC (Type Win+R key).
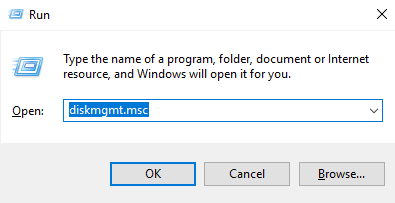
- Open Device Manager by typing
diskmgmt .msc
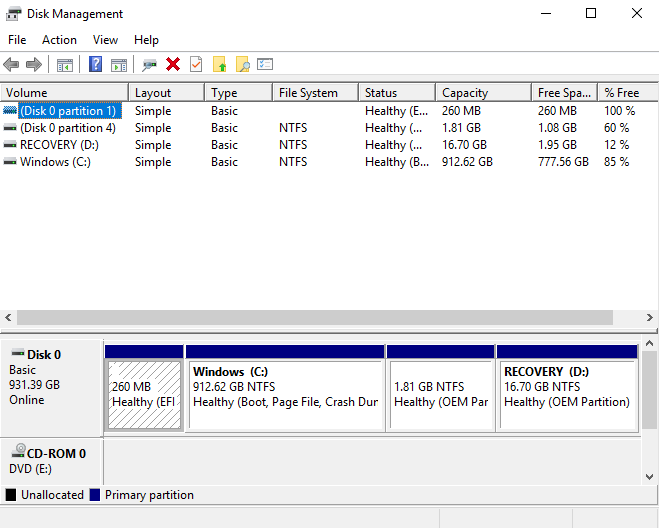
- Here you see the list of drives connected to your PC. The down-arrow marked drives are disabled and you have to enable them manually.
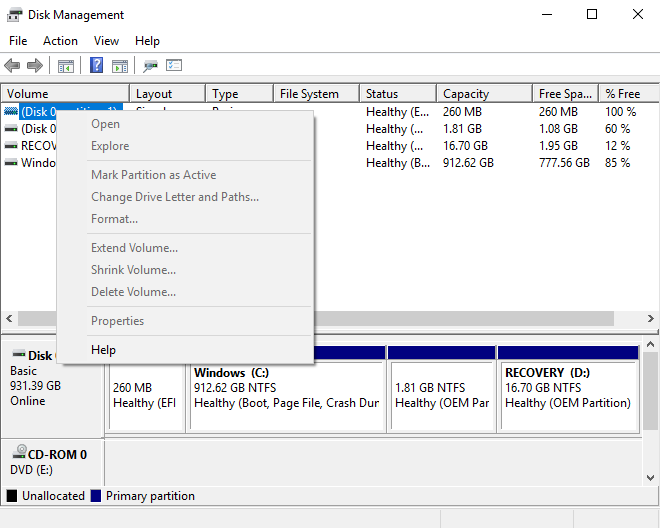
- Right click on the drive you want to enable and go to Properties> View> Enable Device and hit OK.
After successfully done these steps now make sure your hard drive is running as online.
Hint: If still, the drive is showing down error then you must make it online. Follow some steps.
- Open Control Panel on your PC and select Administrative tools option.
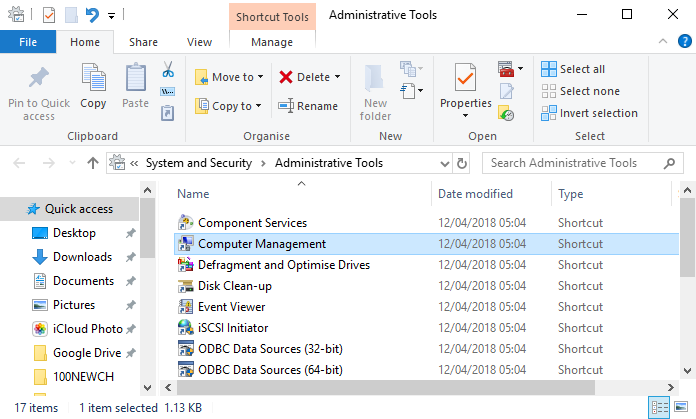
- Now select Computer Management> Disk Management and choose your drive name from the list.

- Right click on the drive and tap on Online option. (If the disk is not showing online option this means it is already online.
Now check your drive, hope it is available and showing up in disk management.
Well, if you still facing trouble in locating your hard drive then we recommend you to for third-party tools such as MiniTool Partition Wizard or FonePaw. This software also helps you in recovering the data or missing data from hard drive. The best thing is its ease of usability. Let us check how it works.
Using MiniTool Partition Wizard
MiniTool Partition Wizard Download
- On the very first screen, on the top menu tabs, tap on Partition Recovery option.
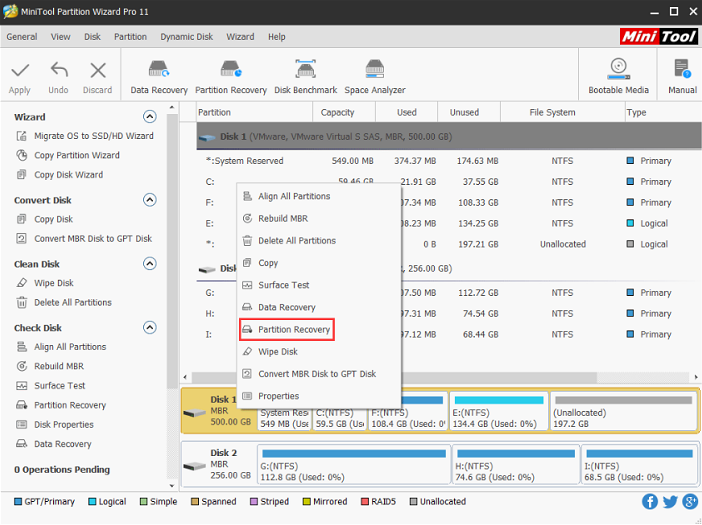
- This shows all the disks attached to your PC. Click on the Disk you wish to recover and hit the Next button to recover.
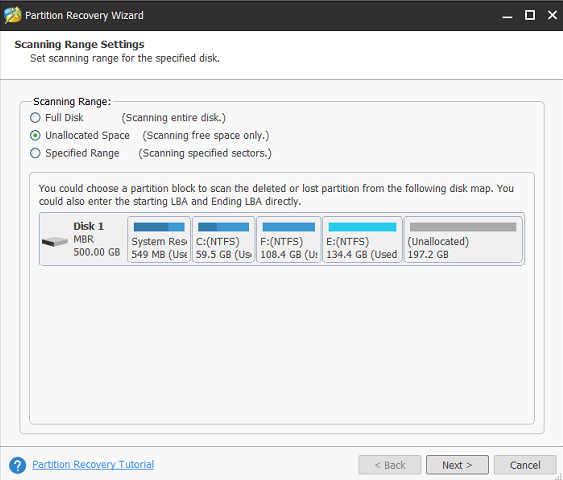
- Now the pop-up window appears showing different options for Scanning Range.
Full Disk: Choose this option to scan complete disk to find deleted or lost partitions.
Unallocated Space: Use this option to find unallocated option in less time.
Specific Range: Specific range as you set to scan from hard drive.
- Select the option according to your need and tap on Next button.
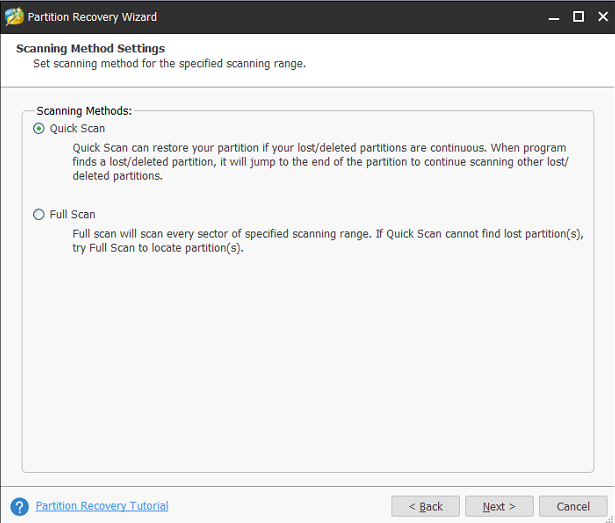
- Again two options appear showing either Quick Scan/ Full Scan.
NOTE: If your partition is in a continous manner then go for Quick Scan, otherwise tick Full Scan option. Full Scan checks every single sector and may take some time.
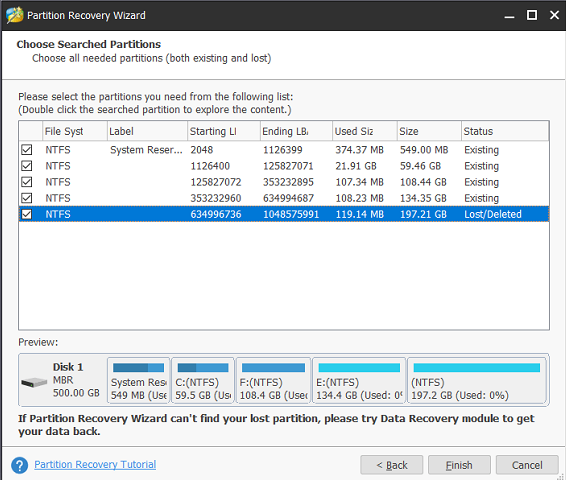
Once the process gets completed, you will see the complete list of all deleted and existing partitions. Check the partitions you require and hit the Finish button. Now you again come to the first screen of MiniTool Partition Wizard.
- Double-click on the search partitions to see all the partitions you have recovered.
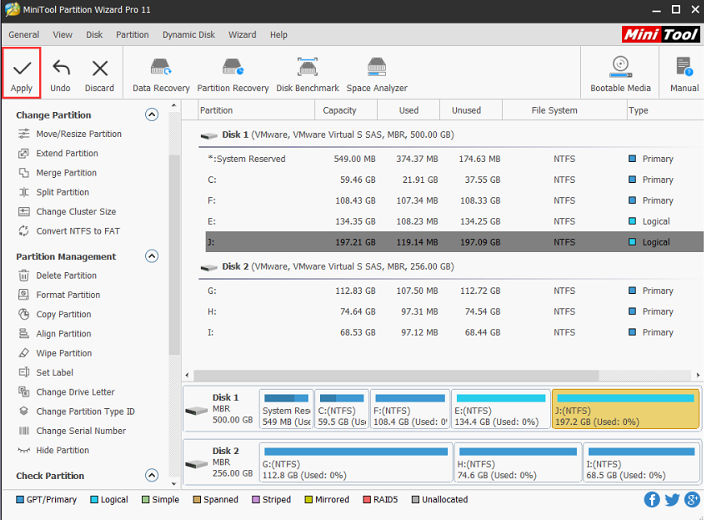
- On the main Interface, you are able to view the partition you recovered, click on Apply to recover it.
I hope you didn’t find any problem in following these steps.
Now you must be wondering the data you have just recovered is not available, the reason is you have to assign a drive name to show up. Here is how you can recover it.
- Click on the Change Drive Letter on the left of your screen.
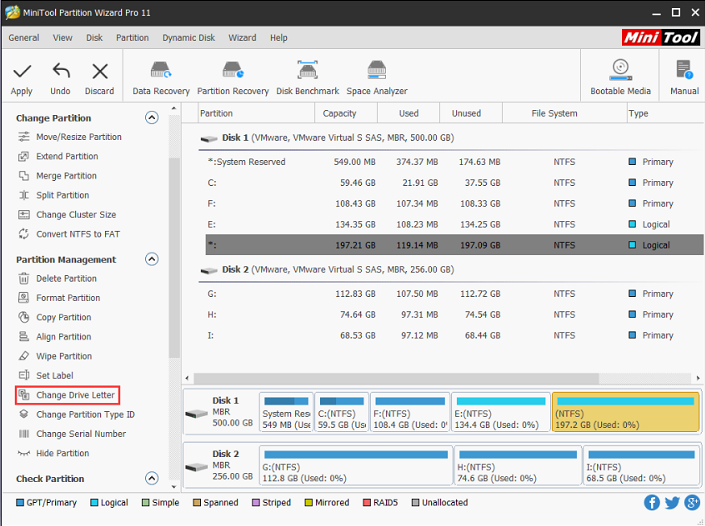
- Give it a new name (E:/ F:/ G:) anything you want.
- Now click on the Apply button.
By this way, you can easily fix if External Drive not showing up in disk management.
For the latest tech tutorials, online deals follow us on Facebook, Twitter