With the latest release of MacOS Mojave, Apple brings lots of exciting features to their list. To keep better security of the device, different additional improvements are done. On the other side of this to provide better visible improvements, MacOS Mojave offers Dark Mode to provide a better user experience. As this is addition to previous Dark mode which even supports many applications (basically developed by Apple and some other third-party app).
Why we must use Dark Mode?
First of all make sure you have updated MacOS to Mojave and then to enable follow some simple steps.
Enable MacOS Mojave Dark Mode
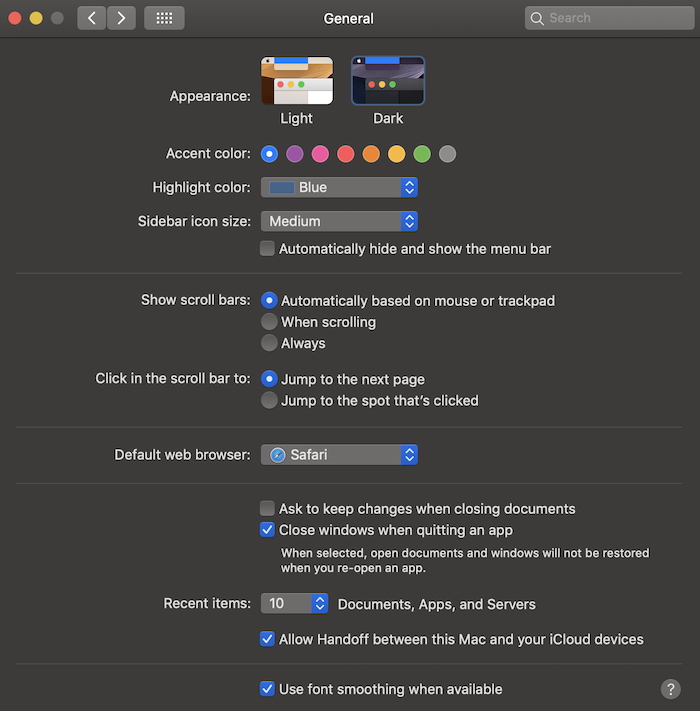
- Tap on the Apple logo (top-left of the screen) and select System Preferences.
- Tap on General option from the list.
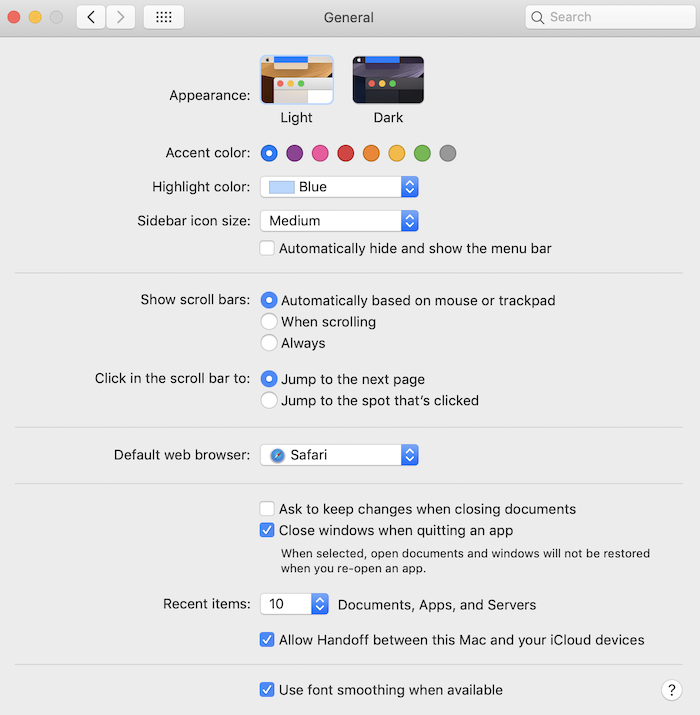
- Choose Dark option next to Appearance and close the window.
Soon you followed these steps, you can see the night mode start working. Many apps already work with Dark mode but some still working as their previous version. Maybe they update them soon.
Similarly you can disable Dark mode anytime using similar steps. Let us quickly check some of them.
- Go to Apple icon on the top left and choose System Preferences.
- Tap on General mode and choose Light mode next to Appearance.
This makes your appearance back to normal.
Must see:
2 Comments
Comments are closed.