No doubt Nitro Productivity Suite (Nitro Pro 12) is one of the top-rated PDF software, unfortunately, Nitro Pro for Mac is not yet available and works for Windows only. Still, there is the best way to access Nitro Productivity Suite on your Mac and you can also access all Nitro features such as Nitro VIP access, Nitro Cloud Storage, and all others.
Nitro reveals that by using Virtual Machine, Nitro Pro can be successfully run on Mac. In our recommendation Parallels software and VMware Fusion are the two best software in virtual machine categories to run Windows on your Mac.
What is a Virtual Machine?
Virtual Machine helps in creating the environment of different operating System into some specific functions. Virtual Machine consists of an advanced combination of software that behaves as other OS. In simple steps, to run other OS on Mac or vice-versa Virtual Machine makes this possible. Parallels and VMware Fusion are the best available software to run Windows on Mac. There are many advantages to run Windows on Mac, one such is using Nitro Pro on Mac. There are different software that is only available to Windows. Here we are going to use VMware fusion to work Windows on Macbook.
Why VMware Fusion Pro?
VMware Fusion is a powerful virtual machine for Mac that easily works Windows 10 on Macbook. VMware is so much advanced that many professional users recommend this software. VMware comes in two version Fusion and Fusion Pro. VMware Fusion Pro consists of some more features related to 3rdParty Integrations.
How to Use Nitro Pro for Mac Using VMware Fusion Pro
VMware Fusion and Fusion Pro are paid and you have to buy it to run on your Macbook. The major difference between them is some of the advanced features on the Pro version. VMware fusion pro comes with 30-days free trial. So you can use it for free.
Along with VMware Fusion, you also need a Windows on your CD/ Hard Drive/ Pen Drive. If you don’t have, you have to purchase it. Follow some simple steps below.
Download Windows 10 on Macbook
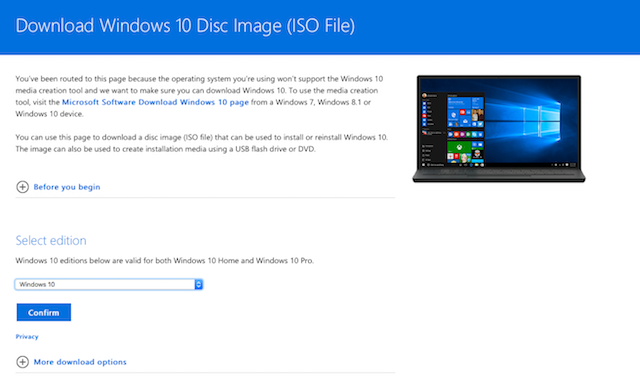
- On your web page browser, go to Microsoft Windows 10 ISO download page.
- Here you will find different Windows edition. Choose Windows 10 from the drop-down list. You can choose another if you like and click on the Confirm button.
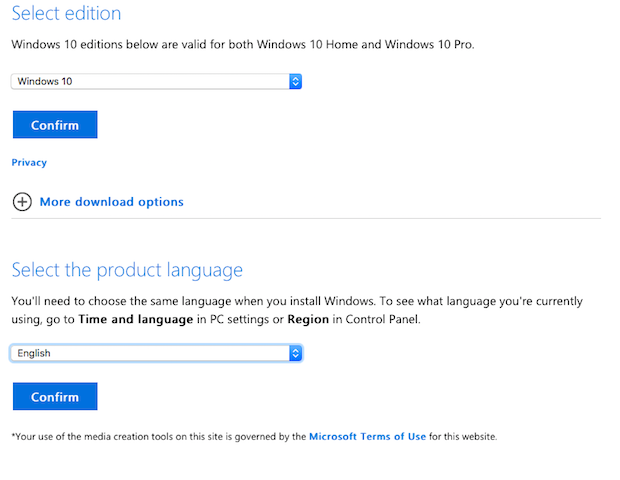
- Now the next step is to choose your language, select English and Confirm it.
- On the next page, there is an option to choose from 32-bit and 64-bit. Choose one from it and click SAVE option to start downloading.
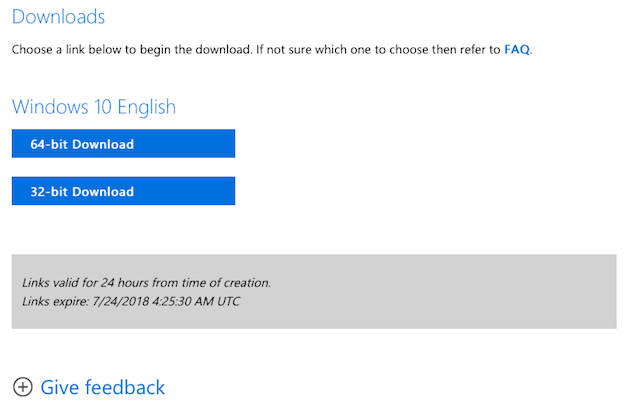
- This may take few minutes, wait till the download process gets completed.
Download and install VMWare Fusion Pro
Now its time to download VMware Fusion Pro on your Mac. This is a paid software but you can use its 30-days trial period. If you like to continue using it if you find any problem then discontinue it without any charge. Once you have successfully installed VMware fusion on Mac follow some simple steps.
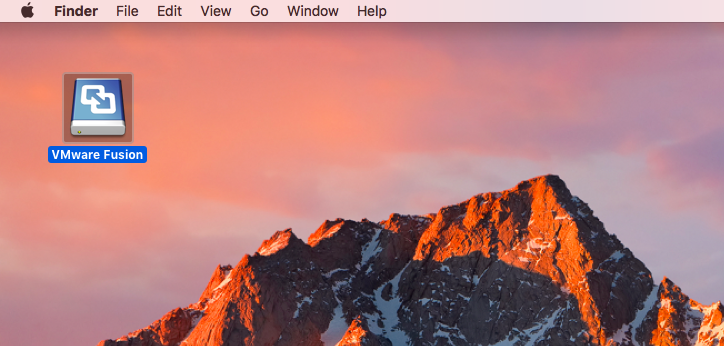
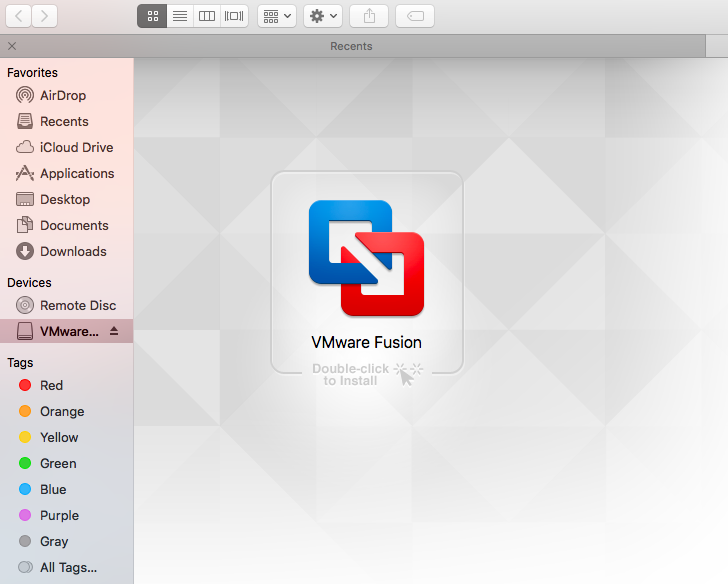
- Our first step is to install VMware Fusion on Mac, double click on downloaded file VMwareFusion.dmg (if you are unable to locate check Finder on your Macbook).
- Tap on Double-click to Install below VMware Fusion icon.
- Confirm the prompted page to Open the application on your Mac.
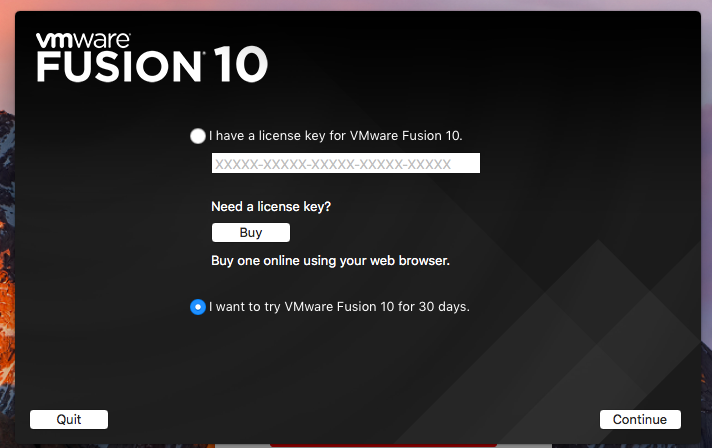
- Now the installation page of VMware will appear. Here you will see two options License key and free trial period. Choose the preferred option you want this time. If you don’t want to purchase then go for the free trial period.
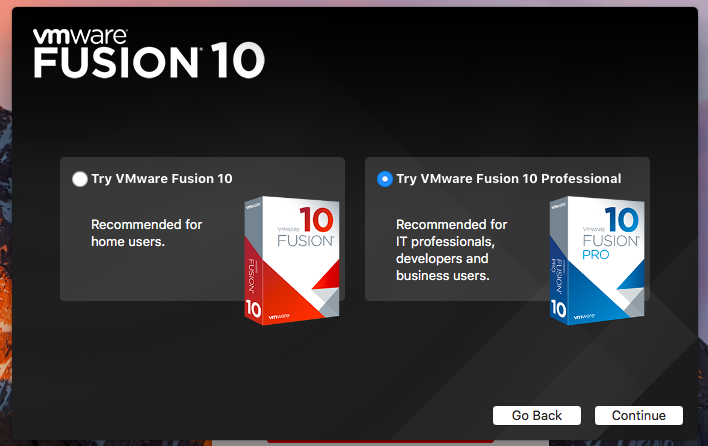
- Choose from Fusion 10 or Fusion 10 Pro if you are using trial period and tap on Continue option.
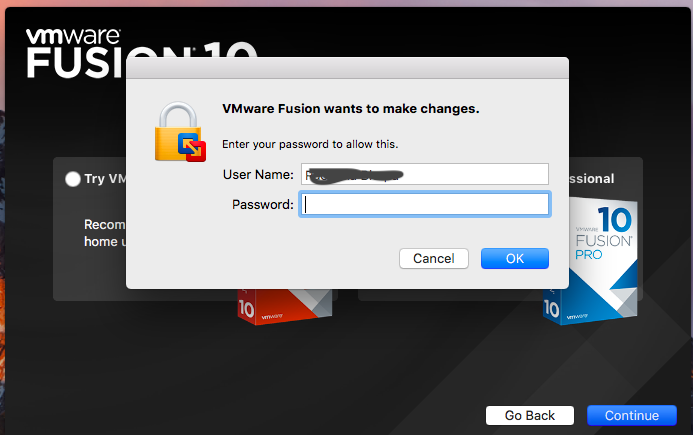
- Every time when you install a new software a login credential is required to confirm your identity as a Mac user and click OK button.
- Now the new page will appear asking to choose to Select the installation method. On the given space drag ISO Windows 10 file as a preferred method of installation.
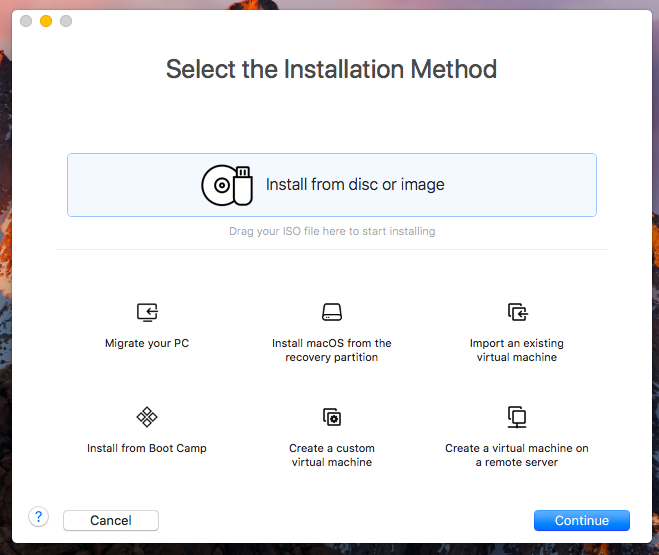
- To work automatically check the box Use Easy Install and click the Continue button, otherwise, you can select manual settings.
- Now you need to enter Windows credentials such as Account Name, Account Type, Password, Windows version, and Windows product key.
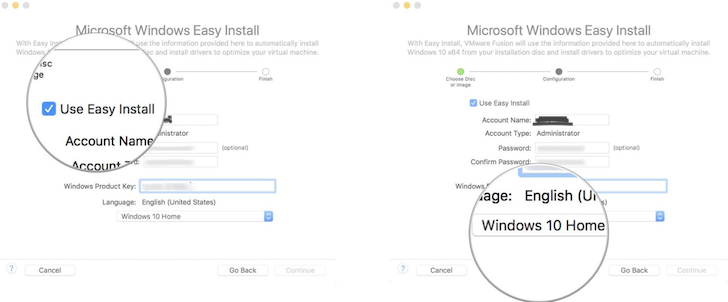
- There is also an option to link both MacOS with Windows. If you wish to link and access files then choose More Seamless otherwise choose More Isolated if you want them separate access. Once done with these steps, click on Continue and Finish button.
- To save new virtual machine on your Mac, click on SAVE button.
- Wait for a moment while a new Virtual Machine set up on your Mac. The new Window will appear showing a completely new Windows 10 right on your Macbook.
Now all your functions work like Windows PC and you can use every feature of Windows PC on your Mac. After successfully creating a virtual machine, you can easily use Nitro Pro on Macbook. Let us see how this process of download to working of Nitro PDF works on your Macbook.
How to use Nitro PDF on Mac?
It becomes very much easy to run Nitro ProductivitySuite on Macbook. Follow some simple steps.
- Go to Nitro Pro official website, purchase a license. Our readers get 20+ 10% extra discount on the purchase of Nitro PDF. See discounted price. Volume license will get an additional discount.
- Download Nitro Productivity Suite, install it on your Mac.
- Enter the license key, and activate Nitro Pro along with all other feature.
By following these simple steps you can easily set up Nitro Productivity Suite on your Macbook. Nitro Productivity has many advanced features so we have created seprate tutorial on How to use Nitro Pro 12?
Recommended: Nitro Pro 12 Review: Pros, cons and all features
I hope you find the information regarding How to Use Nitro Pro for Mac? useful and successfully installed VMware Fusion. If still you are getting any problem then comment below. We are ready to help you. For more review, tutorials, software deals follow us on Facebook, Twitter.