Looking for a screenshot on your Windows PC?
Windows 10 has a number of options for taking screenshots, should you ever need to record what’s on your screen.
Below, we’ve included the most popular ways to capture a screenshot in Windows 10, whether you’re looking to grab the whole screen or a specific region.
Here is a quick tutorial to capture your screen with a simple command and one of the best programs.

With the latest release of Windows 10, there is an issue with the prtscn (print screen) command,, so you have to go for alternate ways to capture the screenshot. Here we will provide four different ways that work perfectly on Windows 10.
How to Screenshot on Windows?
Method 1. Quick Screenshot using Keyboard Command
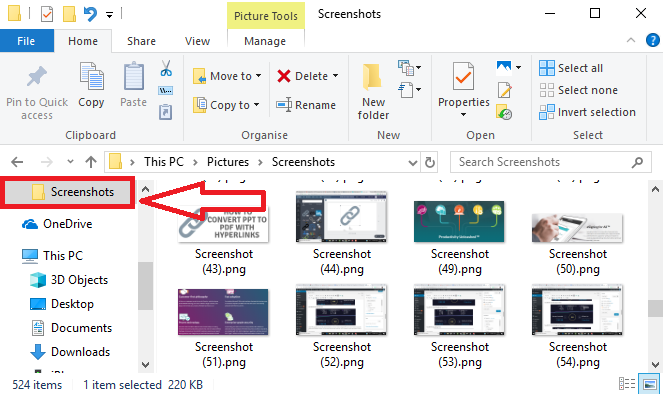
By default, the name of the captured image is something like Screenshot (1).png. You can rename it by right-clicking on the screenshot folder and tapping on the Rename option.
If you want to take a screenshot of a specific region, you have to use a different command like Windows + Shift + S. The whole screen appears gray in color; you can drag the cursor up to the part you need to capture.
The screenshot is automatically copied to your clipboard. You can paste the screenshot to any application with just Ctrl + V.
Method 2. Taking Screenshots on Windows Using Snipping Tools
If you are using Windows 7, 8, or earlier, there are some limitations, such as using a snipping tool; you can not capture mouse movements like pop-up menus and tooltips. For this, you have to follow the above steps.
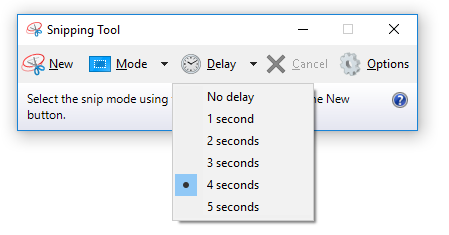
With the update of the Snipping tool on Windows 10, the new feature is added as the Delay option. With the Delay option, you can capture mouse movements like pop-up menus and tooltips. Let us check how it works.
- Open the Snipping Tool app on your Windows PC.
- Tap on the delay option, and choose the time (in seconds) you wish to delay from the drop-down list for a screenshot.
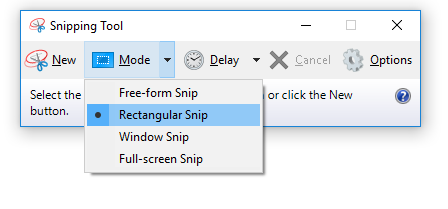
- Then choose the snipping method to capture your screen on the New Tab option. You can select among Free-form Snip, Rectangular Snip, Window Snip, and Free-form Snip.
- Once you have chosen from the above snip options, it will not immediately capture the screen but hold it for the time (in seconds) you have chosen. In between these, you can open a pop-up window or another tool you need to capture.
A snipping tool is one of the recommended ways to get a screenshot more flexibly.
Method 3. Using the Xbox Screenshot feature
This feature is made for capturing video games for Xbox or recording Xbox games. But this is not limited to Xbox applications. You can use this in-built for any of the stuff you are working on. This even records your entire screen.
Once you capture the screenshot using Xbox, it automatically saves it in PNG format in C:\Users\[your username]\Videos\Captures. Follow some simple steps below.
- Open the Xbox app on your PC.
- Open the Settings tab; under this, tap on the Game DVR option.
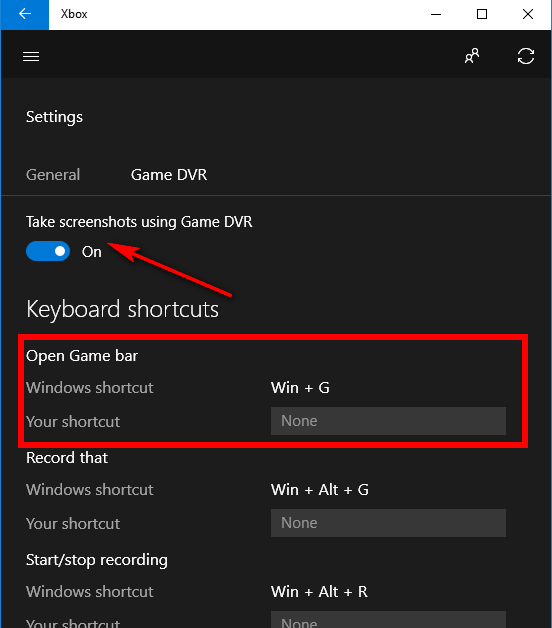
- Turn ON, Take screenshots using Game DVR option.
You can see the different keyboard shortcuts to capture the screen. Press Win + G and tap on Yes; this is a game if prompted while capturing the screen. After this, tap on the camera icon to start capturing the screen.
Method 4. Get Screenshots with Snip & Sketch
The Snip & Sketch app that comes standard with Windows 10 allows for enhanced snapshot capabilities. You may use it to annotate screenshots, take screenshots of certain areas of the screen, or capture screenshots after a delay.

Grab a Screenshot of Some Portion of Your Display.
Just hit Windows+Shift+S to snap a screenshot in Snip & Sketch. Your mouse will change into a crosshair and the screen will become grey.
Near the top of your screen, you’ll see a bar with a number of buttons. Choose the desired feature. Here’s what each button does, from left to right:
- A new feature called “Rectangular Snip” allows you to choose a rectangular area of the screen by dragging the pointer in that direction. Windows will capture a screenshot of whatever is inside the rectangle.
- To use Freeform Snip, just drag your mouse to define any shape on the screen (or a stylus or finger on a touch screen). When you use Windows’s screenshot feature, it will capture the region you choose.
- When using Window Snip, the cursor changes into a crosshair. Just hover it over a window and click to capture an image of that one.
- To capture the full screen, use the “Fullscreen Snip” button.
- Cancel capturing a screenshot by closing the snipping overlay. (The ESC key on your keyboard will also do this.)
When you use a shortcut to launch Snip & Sketch, the programme will keep track of the previous setting you used.
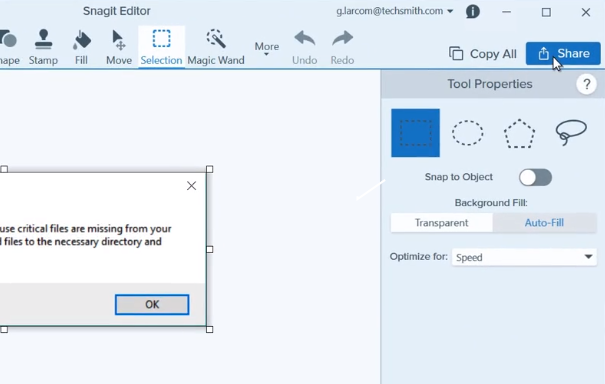
Method 5. Use Snagit for Powerful Capturing
If you are not concerned with spending a few bucks, Snagit from TechSmith is one of the best screen capturing and recording software.
If you have your regular work with multimedia work such as screen capture and screen recording, you must go for TechSmith Snagit without any second thought. Let us check what it offers exceptionally well.
- Highlight specific regions: Convert your standard screenshot into simplified graphics. You can focus others on a specific region that needs to be noted.
- Favourite Tools: Keep all your favorite tools on the front screen. You no longer need to navigate through all the features as keeping the most commonly used tools such as stamps, arrows, and shapes in the same place makes work easier and saves you time.
- Image combination: combine different screenshot images and combine them into one according to the appearance you like.
- Extract Text: It is impossible to copy text from a picture, but if you have chosen Snagit, you can extract text from a captured screenshot and paste it anywhere you want.
- Edit Text: From the captured screenshot, you can edit the text, change the fonts, colors, and much more. You are no longer required to create a similar copy if you have Snagit.
- Animated GIF: Create your short clip into GIF and use it anywhere.
- Capture in a flow: Suppose you need to take a screenshot while scrolling through web pages; you can easily capture all of them in a single screenshot.
- Special Effects: Snagit is full of tools, and you can add special effects to the captured screen. You can place borders, shadows on margins, and other such effects.
- Blur Content: Having sensitive info you don’t want to share? Simply blur the content on your screenshot.
There are many other excellent tools that Snagit offers. If you are working as a professional or for business purposes, this is recommended. Otherwise, you can follow any of the above three steps in-built on a Windows PC for simple capturing.
I hope you like this tutorial about How to Screenshot on Windows 10? and found no difficulty following the above steps. Still, having any trouble? Comment below, and we are ready to help!
For the latest tech tutorials and online deals, follow us on Facebook and Twitter. For regular updates, subscribe to our newsletter to stay updated.
Related Articles: