If you cannot access any app or other security apps, you need to optimize security and privacy settings. Privacy settings are sometimes also applicable if you won’t let others use the stuff you made private. Change the privacy settings, and no one can make any changes. Follow some simple steps to make your security and privacy settings.
How to Change Security and Privacy Settings on Mac?
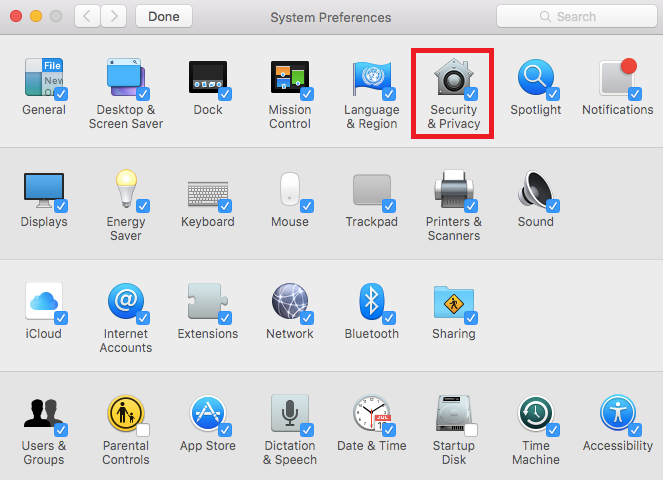
STEP 1: Open System Preferences by clicking on the Apple icon on your Mac screen’s top left.
STEP 2: Tap on Security & Privacy to open it.
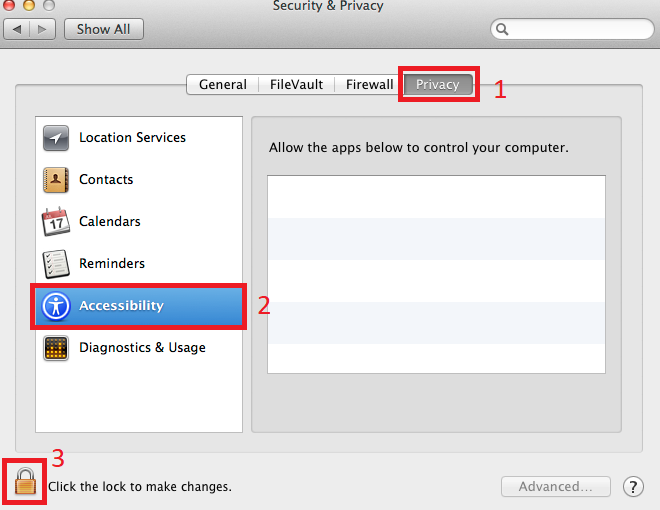
STEP 3: Now, under the Privacy tab, click on Accessibility. Here you need to click the lock icon below to make any changes. This is to ensure that this Mac belongs to you only; here, you need to enter the password to make any changes. If you forgot your password, click. After successful login, click on the (+) button.
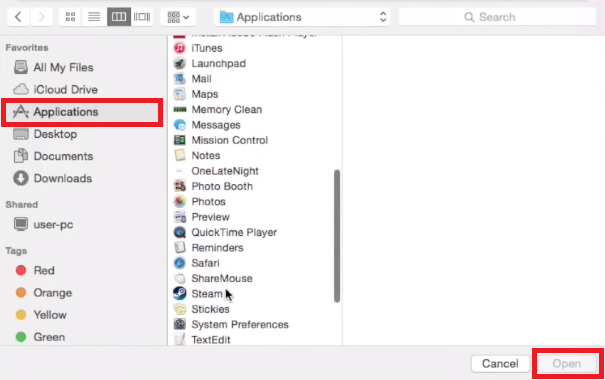
STEP 4: Now, on the left side panel, choose your desired area where you need to make privacy settings. Let us select Applications here.
STEP 5: Select the application you want to access or block. If you wish to access it, tap on Open and after gain, hit the lock button to save the changes you have made.
You are done with the above steps. You have successfully made the changes to your security and privacy settings. Similarly, you can select your desired location to make them accessible or inaccessible to others.
You may also like
- How to remove unwanted objects from photos on Mac.
- How to enable iOS Two-factor authentication for Apple ID
- Two best ways to clear cache from your Mac
I hope you like this tutorial to make your Mac’s Privacy & Security settings. Follow us for the latest Mac tutorials and other Mac applications on Facebook and Twitter.


