Automatic repair is a fantastic way to fix most boot-related issues. If you haven’t used it yet, this is the right time to use this automation tool.
We provide the perfect step-by-step guide to using this option on your computer.
NOTE: If you have some necessary computer data, we recommend you choose the EaseUS Bootable Data Recovery tool.

Still, to be safe, back up all your important data and restore it anytime. Thanks to Microsoft, offering its users for free option. Also, you can check some of the top recommended solutions for backup.
Is there any Easiest option to Fix Preparing Automatic Repair Loop Windows 10?
Many people have used automatic repair features but are still unsatisfied.
But why?
This is because the Automatic repair feature clicks on specific programs and leaves other vital programs unattended.
You might see the “Windows 10 Automatic Repair couldn’t repair your PC” message appears while performing automatic repair.

Don’t be afraid; this is just to let you know that this can be possible too.
So what is the alternative if this occurs?
If you still want to continue with the Automatic Repair feature, continue performing the steps below. Otherwise, some of the best-performing tools make your work much more manageable.
How to Use Automatic Repair Windows 10?
The answer to this is not a single-line answer; so many errors are generated when you are using Windows 10, and automatic repair is one of the best options to fix them.
Some problems include Windows Update issues, driver issues, corrupted Windows, Start menu errors, and many others. But the automatic repair option for Windows 10 solves all your problems.
Check out the complete process.
Moreover, we have also seen improvements in Windows 10 performance after repairing Windows.
And you don’t have to spend anything on this!
What causes the error: Automatic Repair Loop?
Multiple factors cause this issue, majorly are
- Damaged file systems
- corrupted files
- Outdated drivers
- Malware & Viruses & much more.
Method 1: How to Repair Windows 10 Using Automatic Repair
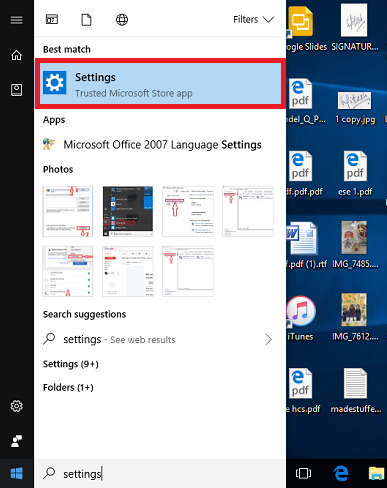
1. Open Windows Settings
Go to the Start icon on the extreme bottom left and type Settings.
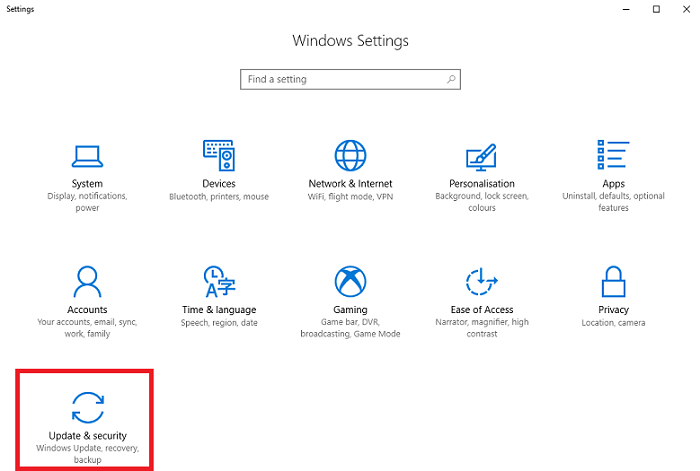
2. Go to Update & security
Tap on the Settings option and choose the Update & security option.
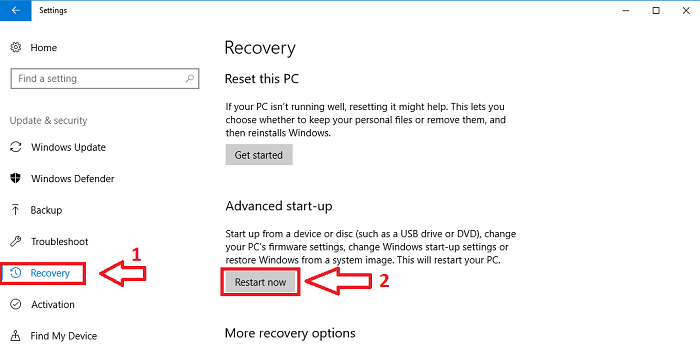
3. Restart from Advanced start-up
Tap on Recovery on the left-side option. Here you will see two options for recovery on the right side. The first one resets this PC, and the second is Advanced Start-up. You have to click on “Restart now” under Advanced Start-up.
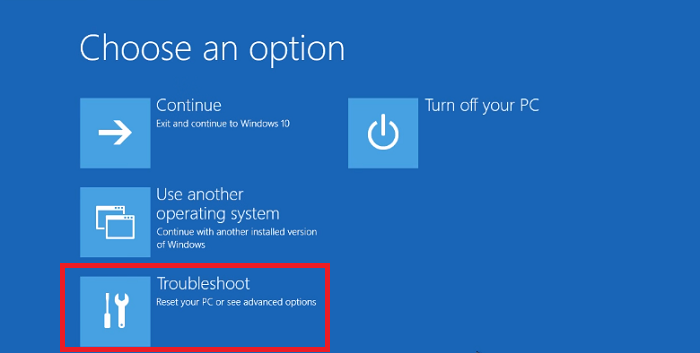
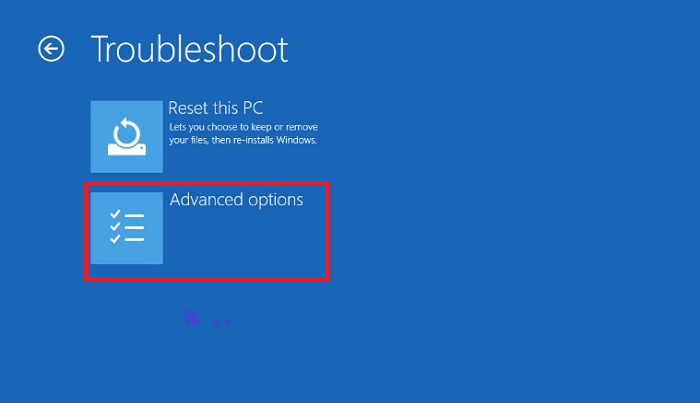
4. Troubleshoot the PC
Your PC will restart, and you will see some options to choose from for the other processes. Tap on the Troubleshoot option.
5. Go to Advanced options
Again, you will see a couple of options for troubleshooting. Tap on the Advanced option.
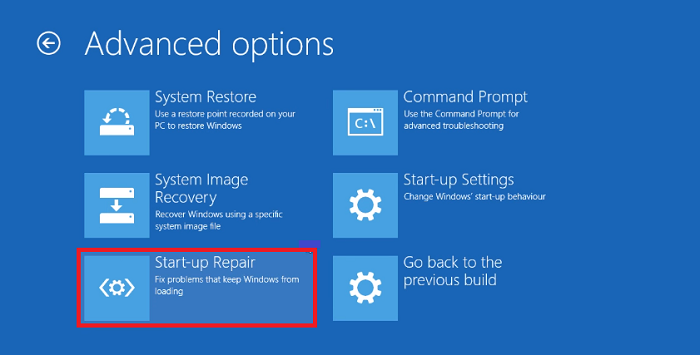
6. Click on Start-up Repair
With the Advanced option, you will again see the different options, but you have to click on the Start-up repair option to start the automatic repair of your Windows 10.
Now you will see your PC will start repairing automatically; it may ask for your account to select and password. Simply select your user account name, enter its password, and click Continue.
Now it will diagnose your PC and fix the problem that it detects and might fix the issue you are facing.
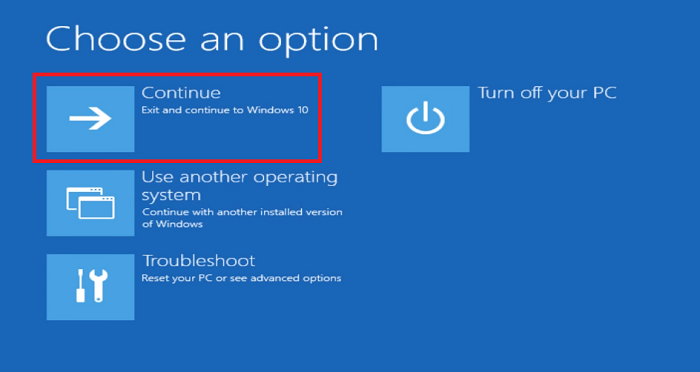
7. Choose the option “Continue.”
This process will repair your Windows and after diagnosis process altogether. Click on the Continue option to exit and continue to Windows 10.
After repairing this, restart your PC and access the new Windows 10.
So this is all about repairing your Windows 10 using automatic repair.
Method 2: Using 3rd Party Tool
Many 3rd party tools are working awesomely to fix this issue. One such is EaseUS Bootable Data Recovery.
Free

For a complete guide on using this tool, check the full tutorial here.
You may also like:
I hope you like this tutorial about how to repair Windows 10 using automatic repair, and hopefully, you will fix the issue you were facing earlier.
Stay in touch with us for more technical stuff and updates on social media Facebook and Twitter.