The proliferation of so-called “smart gadgets” has been one of the most widespread technological developments over the past several years.
A “smart gadget” is an electronic device that can store data and be used as a communication tool. Since these devices can hold a lot of information, we can now keep track of every major moment in our lives.

What happens, however, if you accidentally delete something important that you want to save, like a film of the birthday party for your baby or a video from work, that you want to watch repeatedly? What are other paths available to you?
In this post, we’ll review several ideas and techniques that may help you rapidly retrieve movies that you accidentally deleted or lost on a Windows PC.
System running Macintosh, an iPhone, or an Android smartphone. These computers may have been using either the Windows or Macintosh operating systems.
The operating system on these devices might be Windows, Mac OS X, or iOS. In addition, we’ll give you some advice to keep in mind for the future so you can avoid dealing with the kind of difficulty we just described.
How much of the data erased from a hard disc is still retrievable, even if it has been overwritten?
One may use one of the numerous methods to delete information from a hard disc. If you enter the Recycle Bin on your computer and browse through the things that can place there, it is possible to recover data from the hard disc of your device that you may have accidentally deleted.
This would be the case even if you thought you had deleted the data permanently. After mistakenly deleting data from a hard drive, the EaseUS Data Recovery Wizard may occasionally restore it. When possible, back up your data.
Can videos be accessed after being removed?
Your question may be answered in a nutshell by saying that the answer is yes, it is possible to retrieve videos that you have deleted by accident.
This remains the situation even if you cannot recover it from the recycling bin. Even if you cannot retrieve it from the Trash, you may retrieve it by using data recovery software such as EaseUS Data Recovery.
After a successful search for recoverable data with EaseUS Data Recovery, you may save the data file anywhere you choose.
How long till users can’t access erased information?
Fragments of the deleted file will remain on your hard disc even after you have cleared out the Recycle Bin and removed the items from the Recycle Bin.
This is the case even if you have removed the items from the Recycle Bin. A copy of the file will remain on your hard disc even though the operating system no longer owns it, and you can’t access it. This is true regardless of whether or not the file is accessible to you.
I recently erased numerous movies in error; can I get them back?
However, someone watching the video could accidentally delete it, sending it to the Recycle Bin. Many people’s mobile devices preserve a significant amount of recordings; however, it is also feasible for somebody to do this.
It is valid for one month as measured by the calendar. When anything is deleted, it is entirely removed from the system and cannot be recovered in any way. It is a permanent deletion. It is not possible to recover any deleted items in any way.
Go to the folder labeled “Recently Deleted,” then choose the video you want to bring back from the directory that includes inside that folder. This marks the beginning of the procedure in its entirety.
“Recover/Restore” resets the video’s place before the error. To use this feature, your Android phone must have “Back up and sync on” switched on. This is important to remember. In addition, its age must be under or equal to thirty days old at the very latest.
EaseUS Data Recovery
You can use EaseUS Data Recovery Wizard to retrieve Videos from your hard drive, or you may have your hard drive transported to a business specializing in manual data recovery.
You can retrieve Videos from your hard drive regardless of the situation. However, owing to the high expense of hard drive recovery, you should consider using data recovery software instead since it is more cost-effective and time-efficient.
It would help if you thought of this option because it will allow you to retrieve your data more quickly. You should take this step because it will make the time needed to restore your data more manageable.
Formatted discs, lost partitions, operating system crashes, virus attacks, and raw partitions may all recover data. Vulnerable natural divisions are one possibility.
Other scenarios include raw, lost partitions, operating system crashes, and virus attacks. The following are illustrations of some of the frequent situations you could face.
Data recovery refers to retrieving lost or deleted information from electronic devices such as computers, USB drives, memory cards, and digital cameras. Recover any contemporary file format.
Detailed, Step-by-Step Guidance on How to Restore Deleted Files Using the EaseUS File Recovery Software, Broken Down Into Its Components
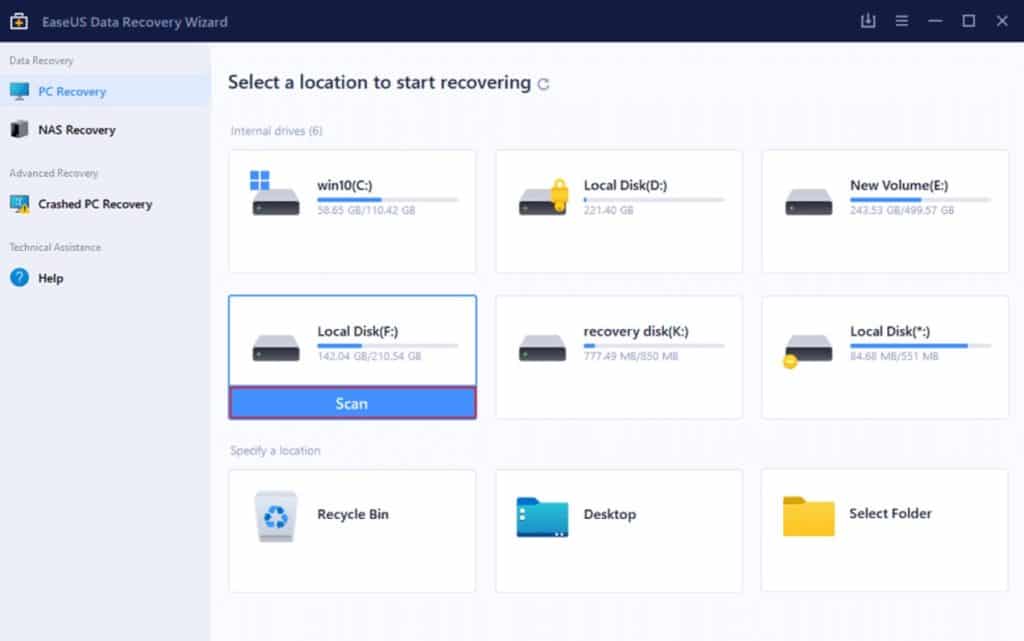
Step 1. First, establish your place of departure and then turn your attention in that general direction.
Get started with the EaseUS Data Recovery Wizard by selecting the storage partition or disc that contains the lost data or overwritten information. Utilize the “Scan” button located on your keyboard in order to search for any data that could be missing.
Step 2. Pick the bits of information that you are interested in obtaining.
When the scan is complete, you can choose the deleted files you want to restore from a list shown. If you need to view specific file extensions, you may easily use the filter to do so.
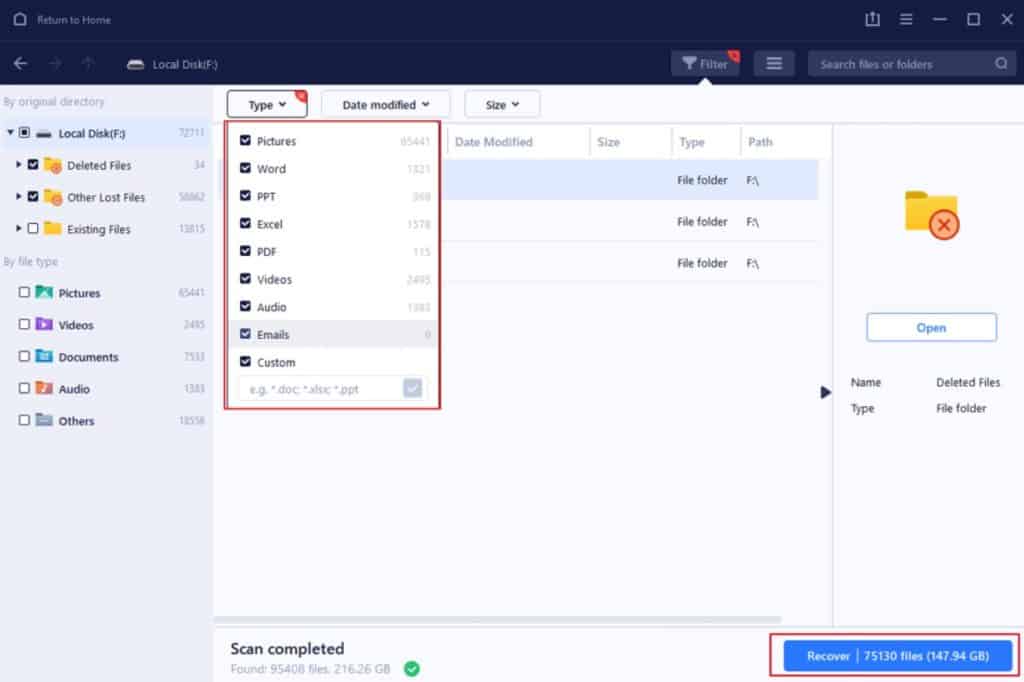
If you have any recollection of the file’s name, you might try searching for it using the “Search files or folders” box on the toolbar. Using this strategy, you can discover the file you are looking for in the shortest amount of time.
Step 3. Conduct research into the matter and make an effort to retrieve any data that may have gone missing.
Look at the information pulled from the database and put it together for you. When you have determined the files you wish to restore to their original form, you may do so by selecting “Recover” from the menu of available options.
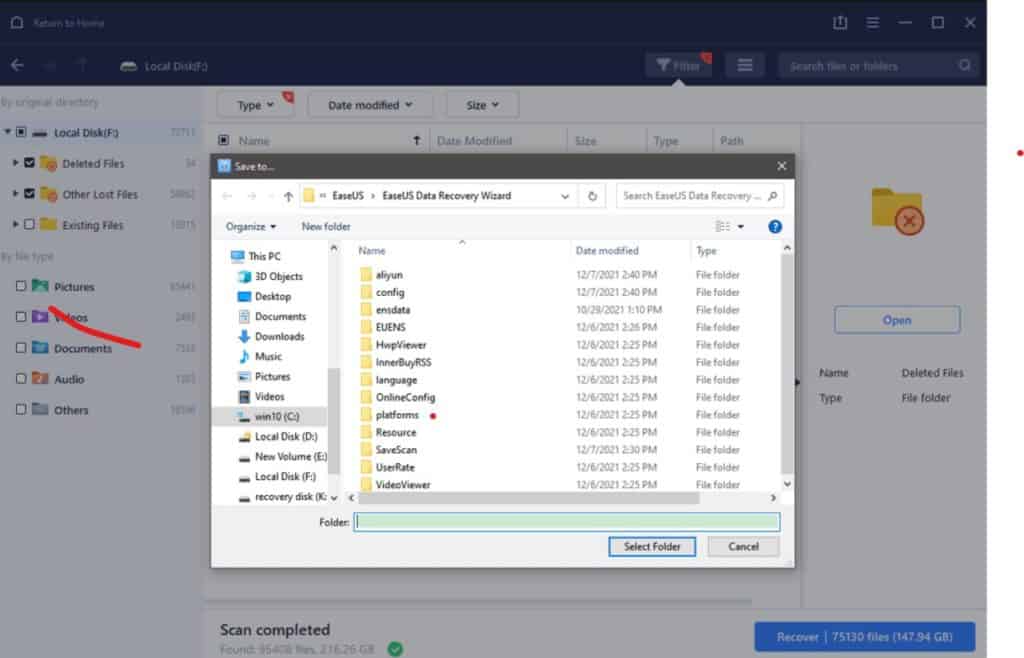
Users will be able to save the recovered data anywhere other than on the disc from which you first deleted it.
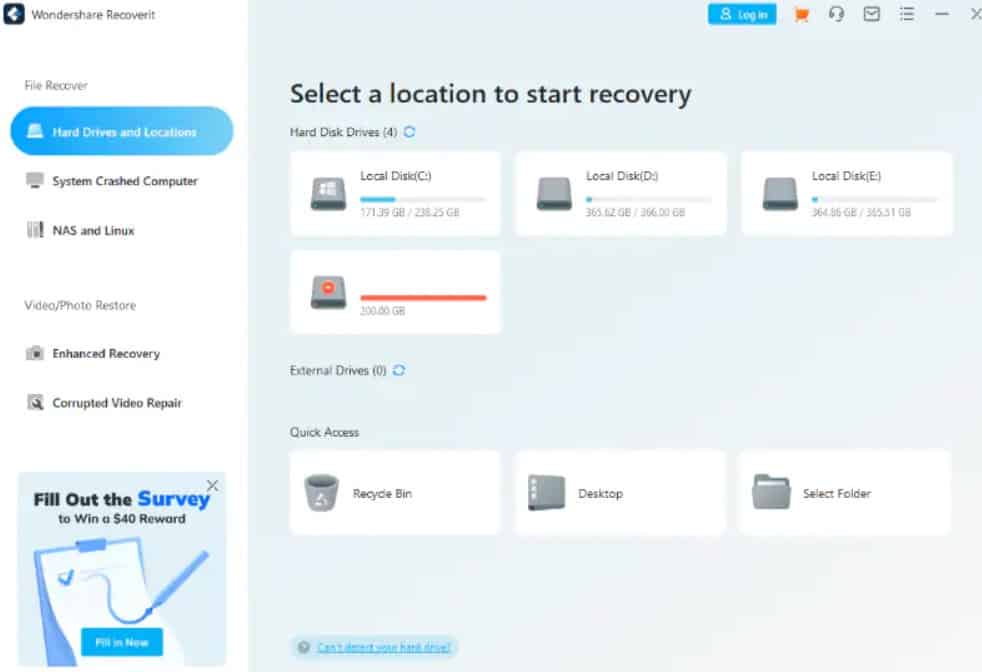
Recoverit
You will need to use software called Recoverit Photo Recovery to regain access to your videos successfully. Video files taken down or lost by accident may be readily recovered from a Mac or other external storage device, even if the data has been overwritten. Even after erasing the data. Restore can retrieve lost data from Mac Trash.
- Now, it is possible to retrieve movies that have been lost or deleted inadvertently from the Trash on your Mac, the hard disc in your computer, the USB flash drive in your computer, the SD memory card in your computer, and the external drive in your laptop.
- It is possible to recover recordings that you have accidentally deleted and films that have been lost because your card was formatted.
- It is possible to watch movies in various formats, including AVI, MOV, MKV, MP4, M4V, 3GP, 3G2, WMV, ASF, FLV, SWF, MPG, RM/RMVB, and others.
Install Recoverit Video Recovery for Mac after you have purchased it and downloaded it to your computer. If you have a Windows-based workstation and download and install it, you can keep using it.
Simply adhering to these procedures will enable you to retrieve any movies you may have mistakenly deleted from your collection.
- First, ensure that your hard disc is attached to your Mac appropriately, and then start Recoverit Video Recovery from inside the software it came with. This will ensure that your data is recovered successfully.
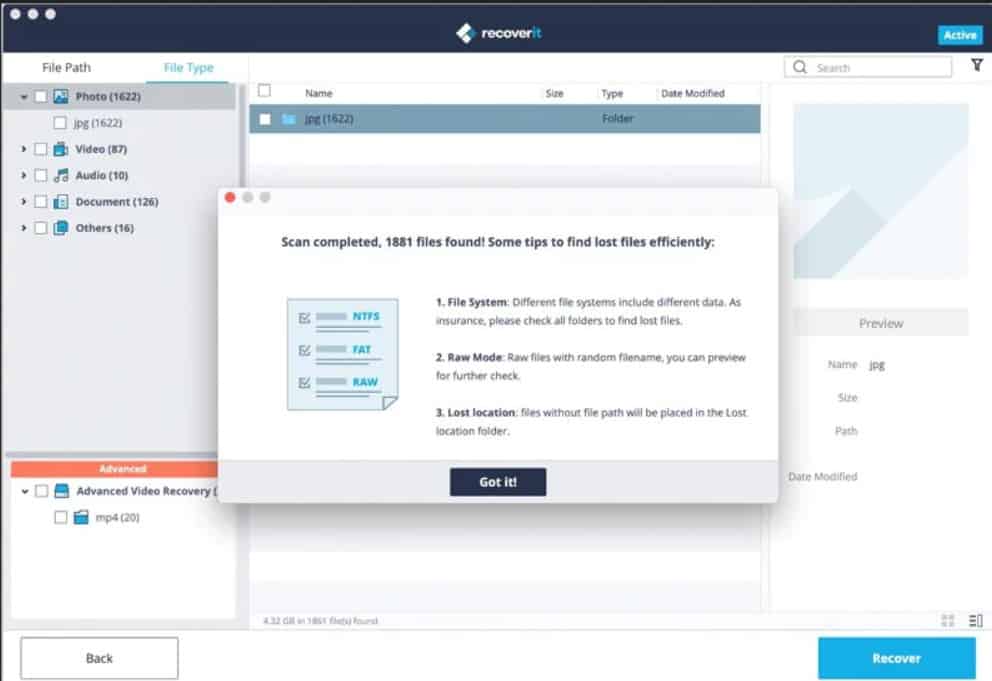
- In the second step, the Recoverit Mac Video Recovery tool will look through the device for deleted videos. This search will attempt to locate any videos you accidentally removed from the device before doing this search.
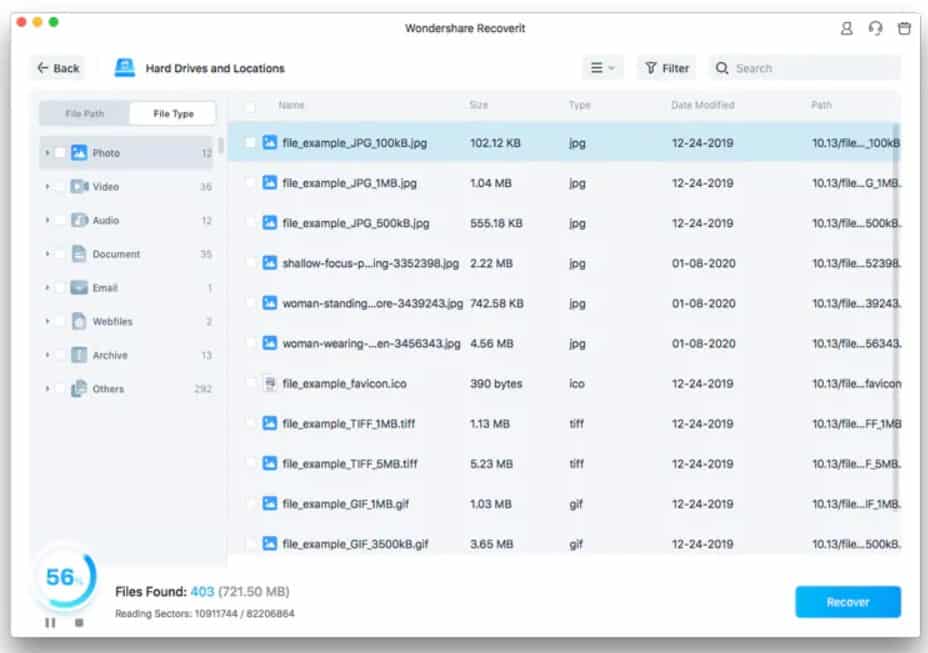
- After the scan has been completed, browse over a few of the image files that were successfully recovered and determine whether any of them are recognizable. If any of them are, move on to Step 4. Once you have decided on the videos you want to recover, you may click the “Recover” button when ready. Once you have made your choices, you can click the “Recover” button.
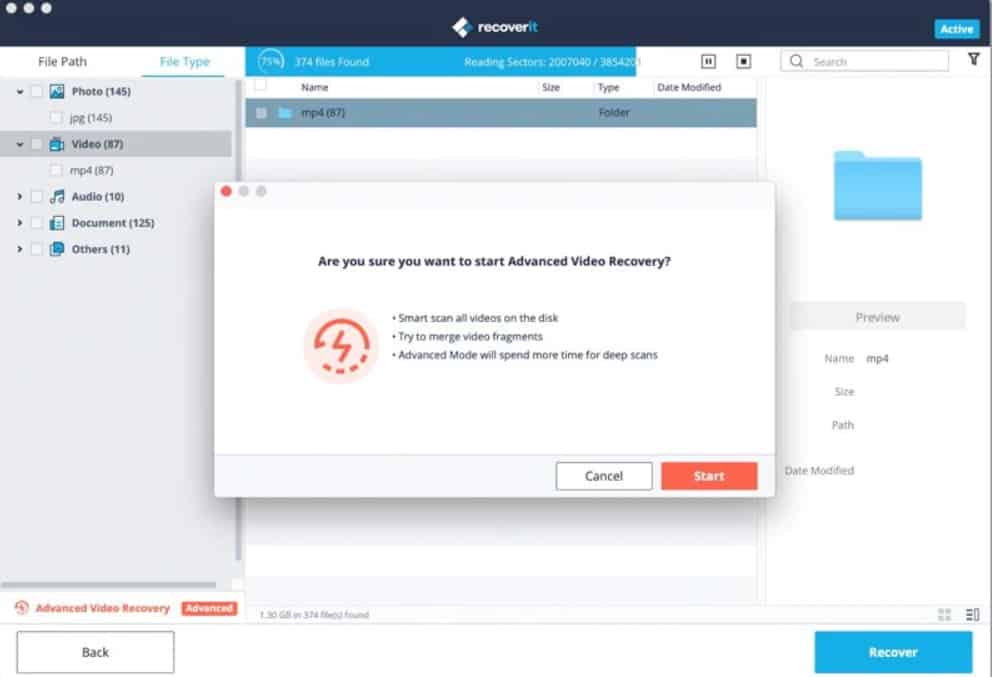
- It’s possible that the button labeled “Advanced Video Recovery” is tucked away in the far left-hand corner of the display. By selecting this menu item, you can retrieve movies that are either difficult to find or require significant storage space. As an immediate consequence, a comprehensive search will be carried out, and it will be able to recover movies that have been removed from the system.
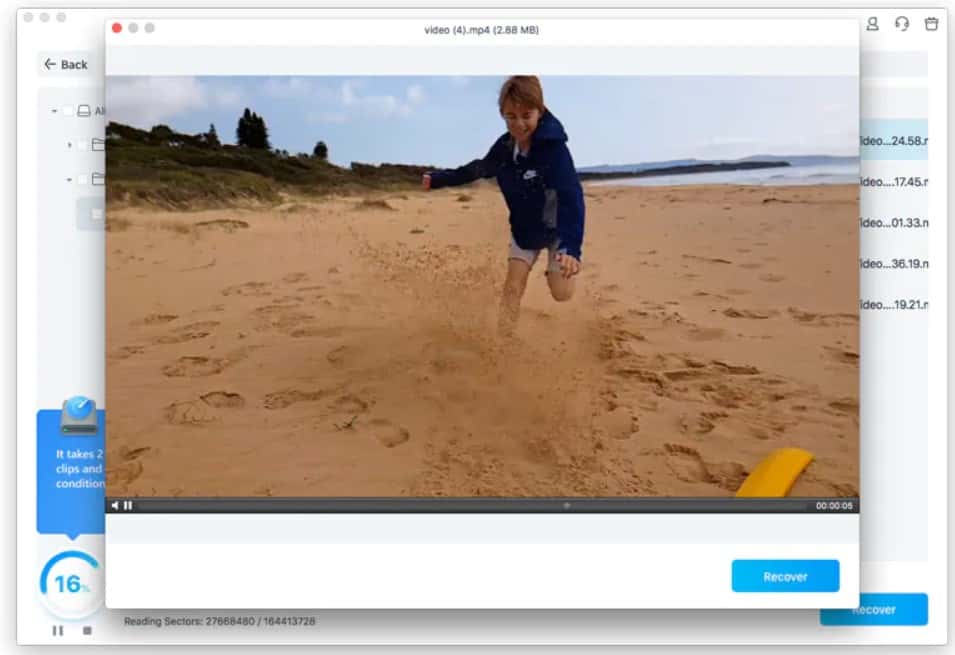
- Be patient while the application looks for suitable video bits to utilize in reconstructing your data using its splicing process. This may take some time. During this time, you will need to remain calm and collected. If you wish to see the recovered videos, you may do so by navigating to the built-in previewer provided by Recoverit. The program is included with this previewer already installed. Tick the boxes next to the videos you wish to recover, and then click the “Recover” button after you are finished. It will allow you to retrieve the films. Please save the files in a location that is different from where they are already stored to avoid deleting any of the information that the files currently contain by mistake.
Video loss on a Mac or other storage device may result from purposeful or inadvertent deletion, formatting, virus infection, or system failure.
These are only some of the many possible reasons behind it. Below are some options. If you lose videos, you must not use your Mac or another storage device for anything else.
In this case, the loss of videos might be the cause. The videos removed from YouTube will not be entirely erased from existence; they will be removed from the website and inaccessible to users.
Because of this reality, the piece of software referred to as Recoverit data recovery for Mac can make Mac video recovery.
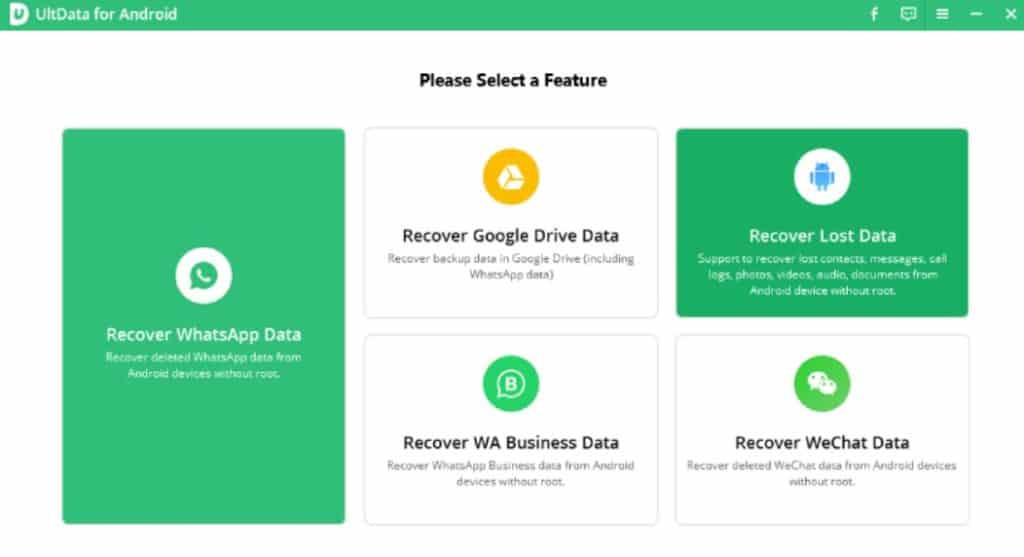
UltData for Android
UltData for Android can quickly scan the device and restore all of the information you had previously lost, regardless of what caused the data loss on your phone.
However, the data loss might have also been due to other factors. UltData for Android can retrieve all of the information you had previously lost. The words “simple” and “convenient” spring to mind.
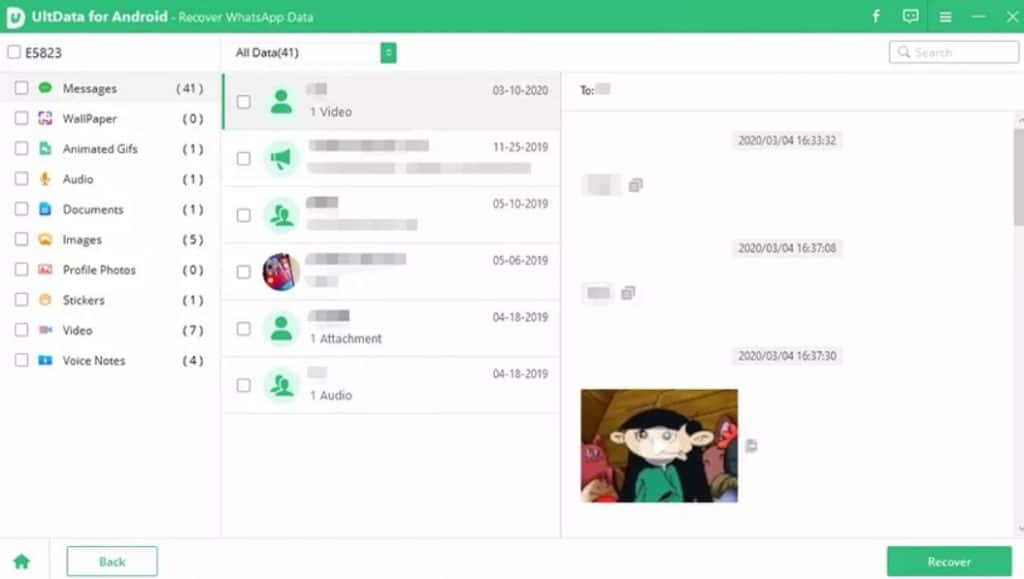
UltData for Android will provide a comprehensive description after a system scan. I will show you this report after the scan. After compilation, you’ll have immediate access to this information. There are only a few difficulties locating lost media files (photos, photo albums, contacts, messages, music, and so on).
This data application for Android is compatible with all Android devices, including smartphones and tablets produced by Samsung, Motorola, Huawei, LG, and Xiaomi, amongst a great many more manufacturers.
You may use it with any Android device. Because it is compatible with such a wide variety of devices, you may put it in your pocket. If anything unexpected happens, you can use it to take care of whatever urgent matter demands your quick attention.
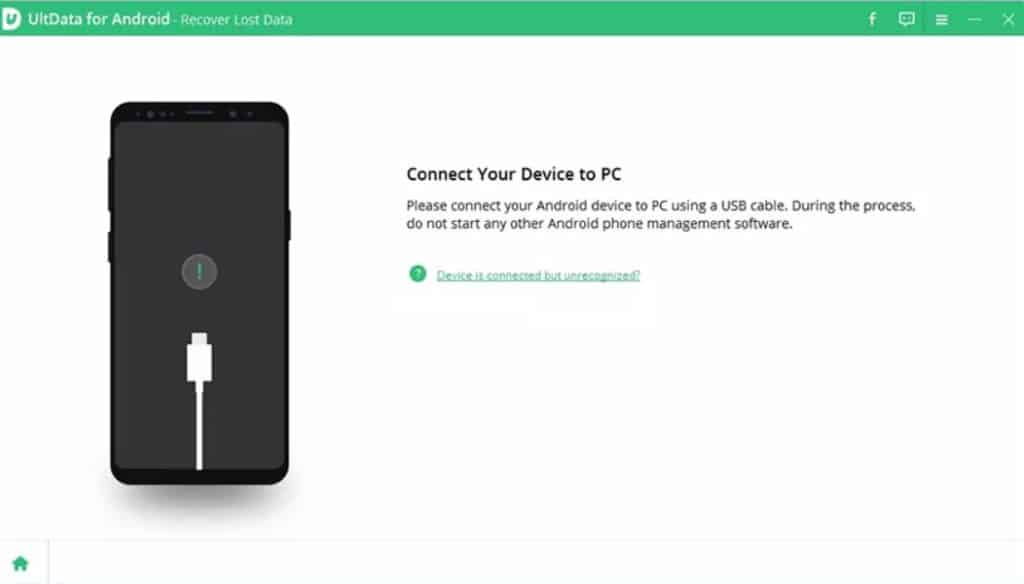
The retrieval of your belongings may accomplish in three simple steps.
Check your electronics’ connectivity.
To connect your Android Mobile to a computer, you will need a USB cable. Then use this connection to transfer data.
Scanner
After determining the kind of data recovery you want to carry out, the next step is to conduct a system scan.
Restore the information that was previously stored on the device
First, you will need to choose the information you want to move, and then you will need to transfer that data to your Android device using the most appropriate method.
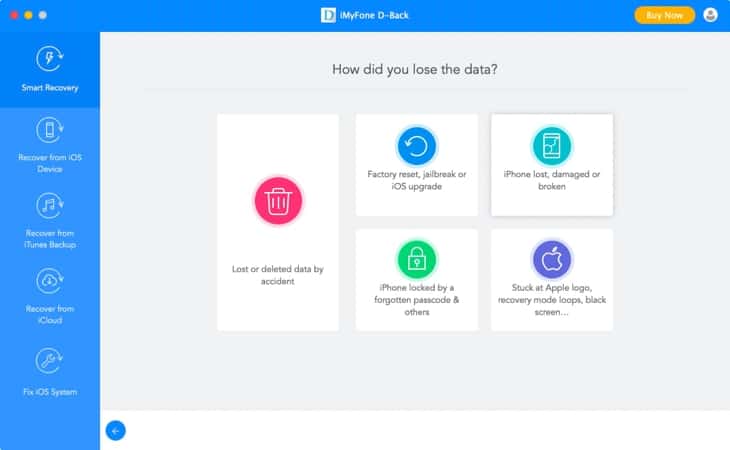
iMyFone D-Back
Is your iPhone not working correctly, or did you set it up such that it requires a password, but you need help remembering what that password is? We have everything covered for you.
If you lose important data from your iPhone, you may rest assured knowing that we have you covered.
IMyFone D-Back for iOS provides four distinct data recovery options, including restoration from iTunes and iCloud backups, to help you retrieve information that you may have taken out of context or lost from your iOS device.
It can accomplish by recovering data from your iOS device and the backup created in either of those services.
Accessing information stored on an Apple iPhone, iPad, or iPod Touch
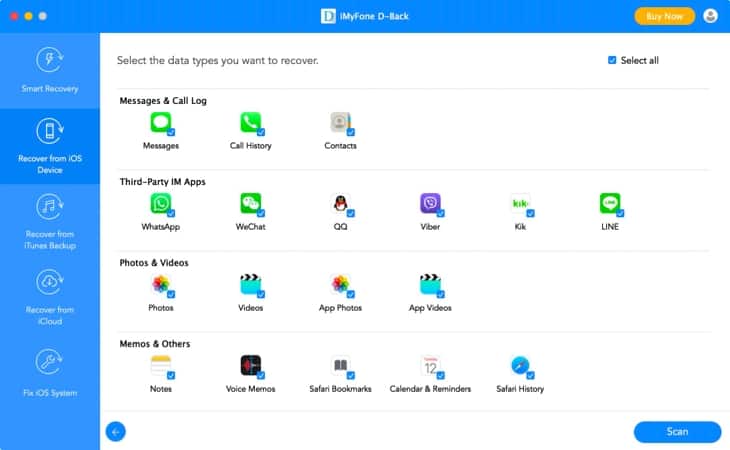
Before scanning the system, connect your iOS device to the computer. A selection panel will show up once you launch the iPhone data recovery software. From this menu, choose “Recover from iOS Device.” With its guidance, users may retrieve deleted information from an iOS device.
- It is sufficient to attach it to your computer as you typically do. You can continue with the setup process by clicking “Next” if it has been determined that your iOS device has been successfully detected.
- To begin, you will need to decide on the kind of data you want to have recovered. Once you have ensured that everything is in order, all that is left to do is press the scan button. The application will immediately start searching through your device as soon as it has been activated to find the data that has been erased after previously saved there.
- The subsequent stage is obtaining the material in question in the first place after previewing it on an iOS device.
Preview and Recover Data from iPhone
- When the scan is done, the data that may recover will organize in a way similar to what is shown in the following illustration: To examine each of the files, click on each of the tabs. If successfully recovered the data, it would be shown here. You will be able to locate the data that you need to recover in a way that is both quick and accurate if you make use of the file status and date picker (which can access by clicking on the funnel icon in the top right). Once you have selected the files you need to recover from the lost folder, you will need to click the “Recover” button in the bottom right-hand corner of the screen.
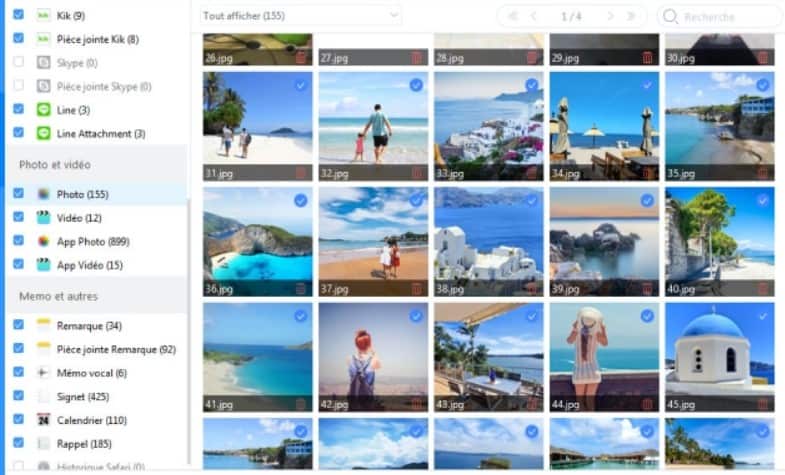
- When the data has been successfully retrieved, a dialogue box will appear on your screen, asking you to choose the location on your computer where you would want the data to be stored once it has been restored. It will happen shortly.
We hope this article helps you in recovering your deleted video!