It is required to clear the Windows update cache if you are looking to free up space consumption. These caches get attached to associated files and folders to make the experience better while occupying the storage simultaneously. So you can delete the Windows update cache after you have done updating to the latest Windows version.
A cache is hidden files that exist with the stuff you are working on and make that task easier according to your history. It is entirely safe to clear cache from your Windows PC.
There are many ways to remove the updated cache from Windows 10 PC. Using the software is the best method if you are looking for the most accessible and best practice. Here we are going to discuss all of them.
How to Delete Windows Update Cache
Here we are going to discuss two ways as follows
- Clear update cache manually on Windows 10
- Using a third-party tool (most accessible)
1. Manually clear update cache
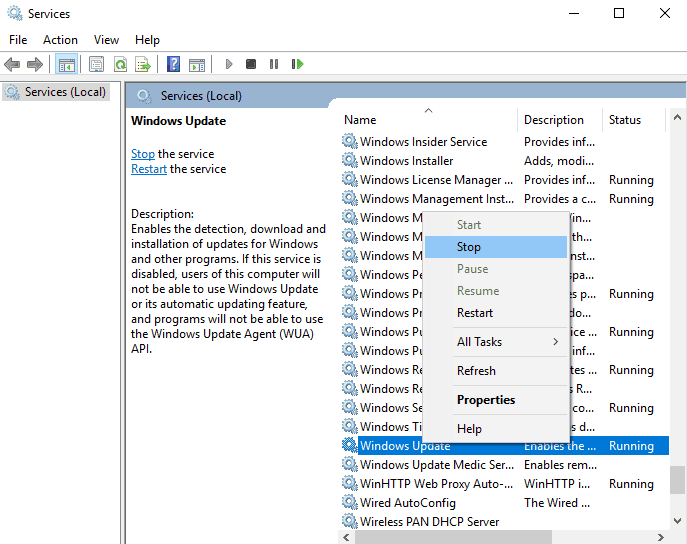
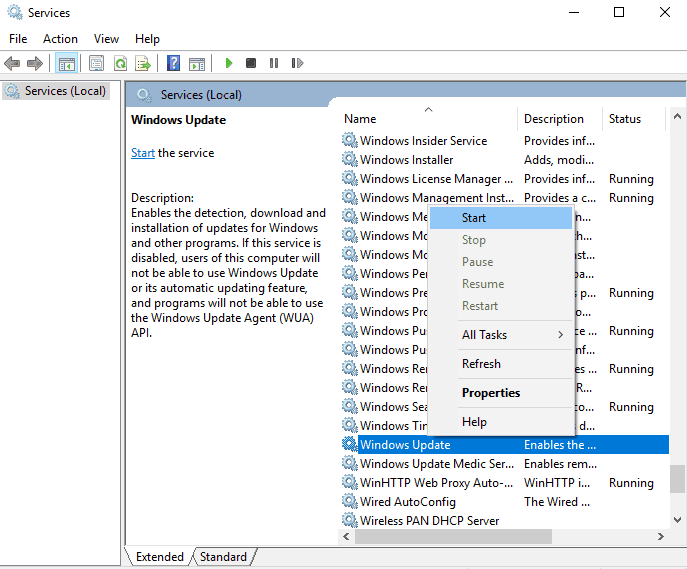
Manually clearing Windows 10 update cache is a bit longer, and you must follow the steps carefully. Before this, make sure you have stopped Windows Update Service. For this
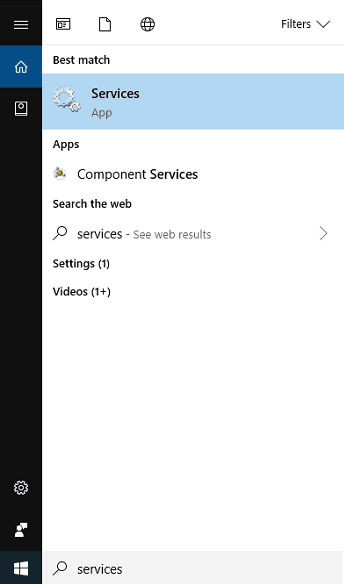
- Search for services in the search bar next to the Start menu.
- Under the Services tab, check for Windows Update, right-click on it and tap Stop.
Now here comes the primary process. Go to the destination folder where Windows files are installed. Suppose, by default, the destination of Windows 10 is installed in C: drive, so you can directly follow the below path.
C:\Windows\SoftwareDistribution\Download
Now follow some more steps to complete the process
- Click on the File tab, tap on the Change folder, and search options.

- Now under the View tab, check to Hide protected operating system files to keep OS files saved but select the Show hidden files and folders and drive option.
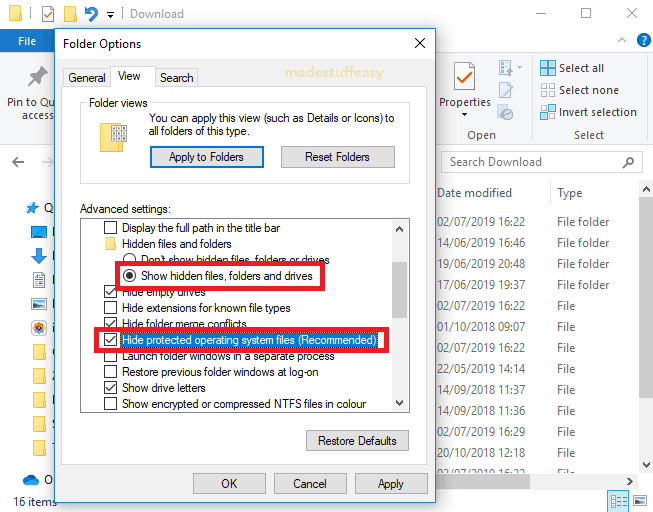
- Click the Apply button.
- Now again, move to the Download folder, select all files and delete them.
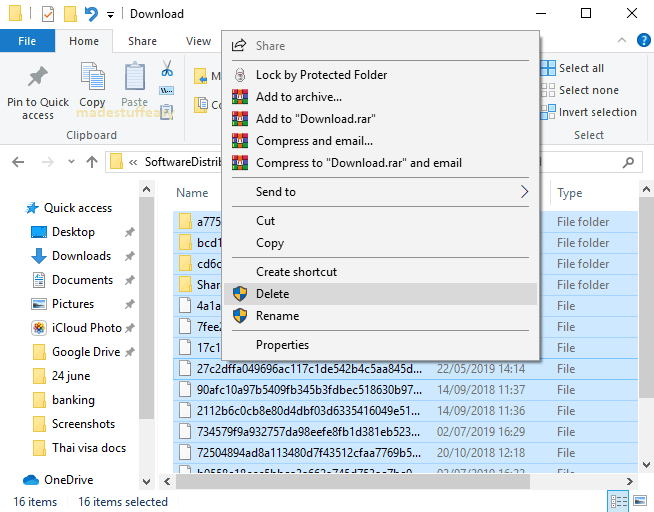
You may get a pop-up window asking You will need to provide administrator permission to delete this folder. Check Do this for all current items and click the Continue button.
Now once you are done clearing your Windows 10 update cache, you have to start the services again you stopped earlier.
Navigate to Services> Windows Update> Start.
Now you have successfully made the changes. I recommend you restart your PC once to refresh the system completely.
2. Using a third-party tool
This is the easiest, and you can easily clean the Windows update cache with a few clicks. We recommend you go for MacPaw CleanMyPC, which is one of the best utility tools and offers various advanced features.
CleanMyPC Discount 2019 (72% Off)
Grab Discount Now on CleanMyPC >>
(Use 4EDUCATION Coupon Code)
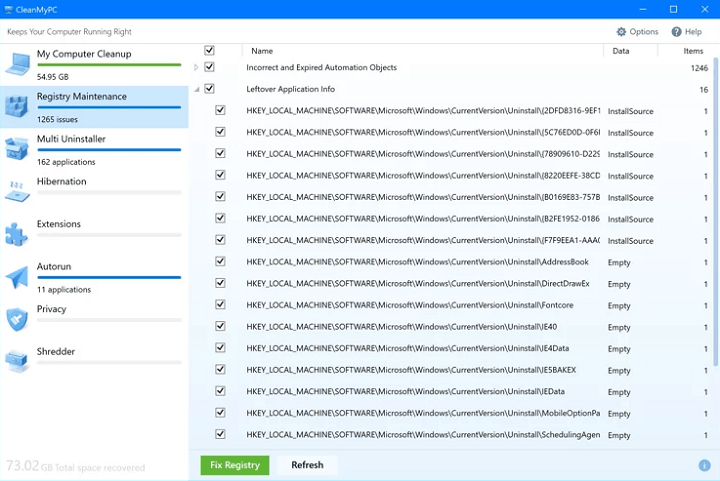
Updating the Windows cache also cleans your system junk, duplicate files, and a lot more. Here is the complete review of CleanMyPC.
I hope you find this tutorial informative and successfully Clear the Windows 10 Update Cache for the latest tech tutorial on Facebook and Twitter.
Related Articles
- Two best ways to recover accidentally deleted files from Windows PC
- Two ways to remove junk files from a PC
- How to increase internet speed using cmd