A few days back, I was working on my laptop and suddenly I saw the week signal on WiFi network. After customizing settings, updating my router, it has set to a default password. And it was all unaware to me. The WiFi remains connected but it won’t be working.

The reason for this is the password was set to default and on my laptop, it was using the older saved password. So this was the time to reset or change WiFi password on Windows 10 PC. I decided to make a quick tutorial for all our readers if facing a similar problem.
There might be a different problem about the WiFi password, but the steps to reset the WiFi password is the same and you can also check your current password using a
How to Change WiFi Password on Windows 10
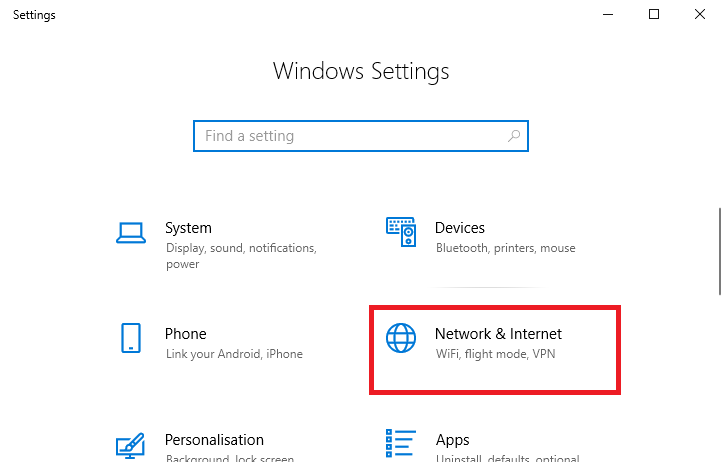
1. Open Settings on your Computer and tap on Network & Internet. Otherwise, you can directly go to the WiFi logo on the bottom right and choose Network settings.

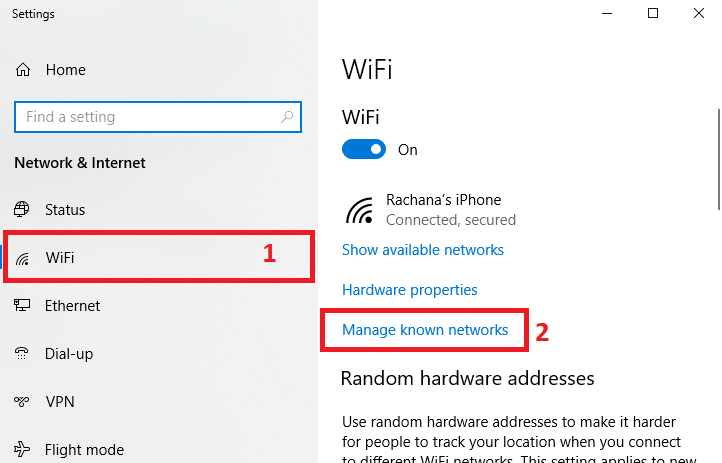
2. On the left side list, tap on WiFi option and on the right side tap on Manage known networks.

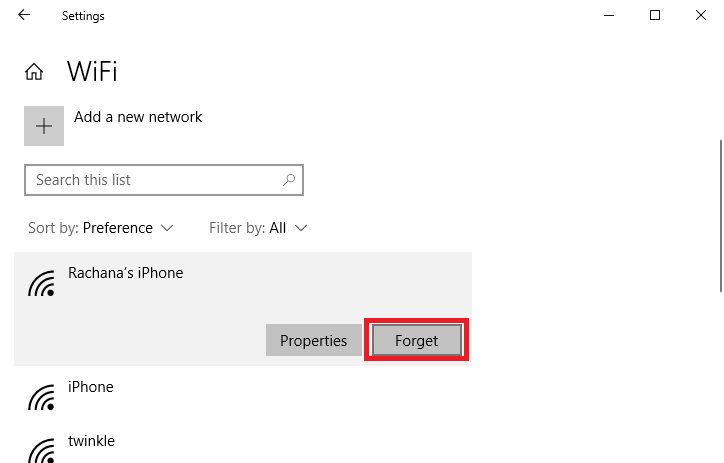
3. On the next window, all known networks will be displayed.
4. Tap on the Wi-Fi network you wish to change the password. Click on Forget option.

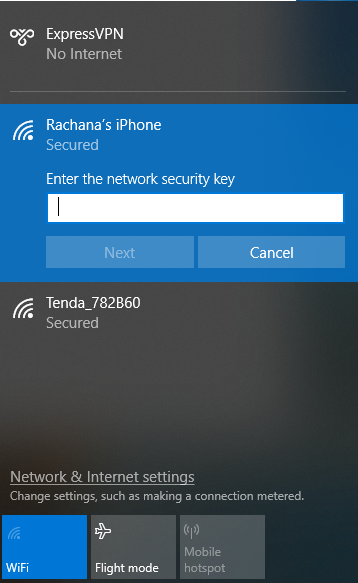
In this way, you can remove that WiFi network connected to your PC. Now to connect again to the same WiFi network, search for the WiFi network nearby (simply tap on Wifi logo on the taskbar menu) it will locate the WiFi, tap on it, enter new password and Connect to this network.

In this way you can easily change WiFi password on Windows 10. It is also noticed that many a time there is an error of no internet, secured message. You can easily fix this issue by following some simple steps.
It is also recommended to check the complete guide if your WiFi is getting disconnected frequently when you shift to a new router or reset the router.
I hope you find this tutorial informative and find all the steps above useful. For the latest tech tutorials, online software deals, follow us on Facebook, Twitter. Subscribe to our newsletter for regular updates.