You can also backup and restore your crucial information using Windows 11’s built-in backup and restore utility.
Making a duplicate of your data and putting it someplace secure is all it takes to back up your information with Windows 11.

You may recover missing data from the backed-up location if you lose the source files on the computer.
Backup copies of crucial data are usually a brilliant idea. Keeping backup copies of your data on an external hard disk in case the originals are lost is a good idea.
A USB device, portable hard drive, CD/DVD, or online data storage account is a fantastic place to save your stuff.
What kind of backups should you make?
Backing up crucial data and those tricky to replace should be your first concern. Papers, emails, financial information, family photographs, and other personal information that is irreplaceable
Profile settings, installed applications, and system settings are less relevant data. You can replace them, but it will take time to get everything back to normal.
How to take backup in Windows 11?
Making a backup image
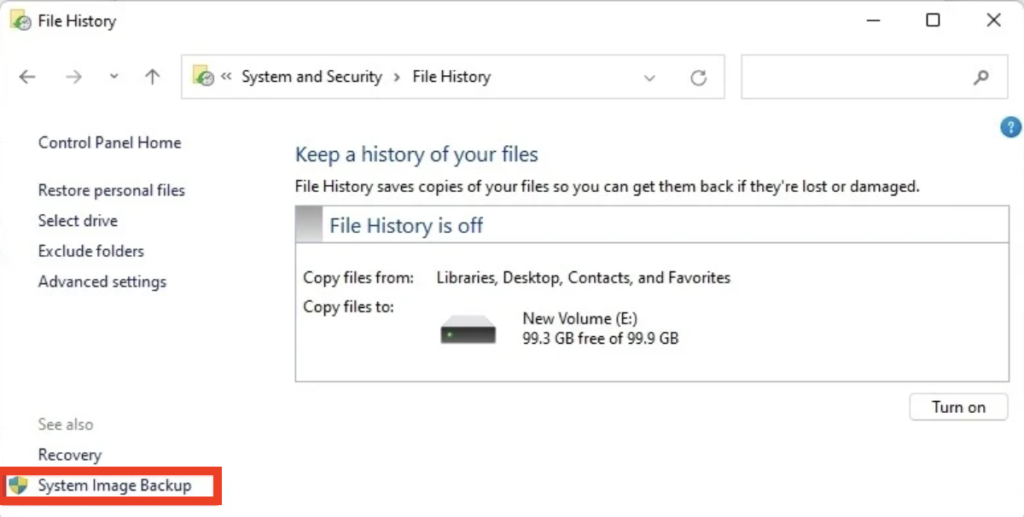
You’ll need to open the Control Panel to execute an image backup. To begin, put “control panel” into the Menu Button search field and pick the best match.
- Choose Backup and Restore from the Control Panel, then create a system image.
- After that, choose a backup destination for your disk.
- Next, it should be selected.
- Select the drive where you want your backup to be saved and then click Next.
Restore Windows files from a System Image
When you build a system image for your files, you may simply restore them in the event of a data loss. The procedure is also rather basic. Here’s how to do it:
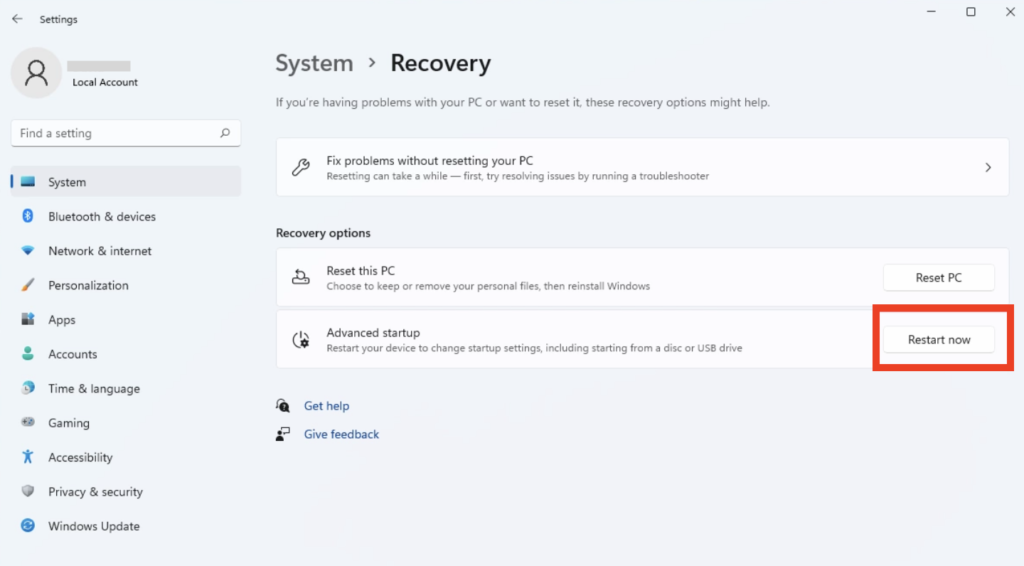
- Type ‘settings’ into the Start menu lookup field, then choose the best match.
- Select System > Recovery from the Settings menu.
- Scroll to the bottom to Advanced Startup and choose Restart Now from the drop-down menu.
- After that, you’ll be prompted to affirm your restart. The procedure will begin after you click “Restart.” Your PC will take a few seconds to start up after the next reboot while it builds the recovery environment. Click Troubleshoot on the following screen.
Backups in Windows 11: How to Recover Them
You may get your files back at any moment once you’ve backed them up. It’s rather simple to restore both picture and file backups. It may take some time to restore your data, depending on how many records you have backed up, so be patient!
Recover Image backups
- It takes a little time to recover image backups, but it’s a straightforward procedure.
- Select Settings by right-clicking on the Windows icon.
- Select Restore from the drop-down menu, then Restart Now.
- When your computer has restarted, pick Advanced Options from the Troubleshoot menu.
- After that, pick System Image Recovery from the list of recovery choices.
- Finally, choose a system image, then click Next and follow the on-screen directions.
Backing up Windows 11 is possible in a few different ways.
Image backups and file backups are the two kinds of backups available in Windows 11.
Backing up your whole hard disk is done via image backups. Specific files and folders should be backed up.
Let’s look at what each sort of backup accomplishes before we teach you how to execute them.
Backup Image
When you generate an image backup in Windows 11, the ISO file for every file, folder and piece of software is produced and delivered to another storage device.

As its name indicates, the image backup option takes a photograph of everything on your chosen hard disk, compresses it into a single file, and then transmits it to a different location.
Back-up File
It’s relatively self-explanatory what a file backup is. Rather than backing up your whole system at once, you pick and choose which files and folders to save.
On the other hand, Windows settings are not backed up in file backups. You may need to reinstall Windows if you need to restore from a file backup and your machine crashes or your hard disk fails.
Backups in Windows 11: How to Recover Them
You may get your files back at any moment once you’ve backed them up. It’s relatively simple to restore both picture and file backups.
Depending on how many records you have backed up, it may take some time to restore your data, so be patient!
Recover Image backups
- It takes a little time to recover image backups, but it’s straightforward.
- Select Settings by right-clicking on the Windows icon.
- Select Restore from the drop-down menu, then Restart Now.
- When your computer has restarted, pick Advanced Options from the Troubleshoot menu.
- After that, pick System Image Recovery from the list of recovery choices.
- Finally, choose a system image, click Next and follow the on-screen directions.
Recover File backups
You have two options when it comes to filing a backup recovery.
According to how much data you wish to retrieve, one approach may be preferred over the other, but both are straightforward.
Manual Transfer
If you’re manually transferring each file, copy them from your backup storage media and paste them where you want them to be restored.
History of a File
Follow these procedures to recover your data while utilizing the File History function.
- Select File History from the Control Panel menu, then Restore personal files.
- To find the date of the backup you want to restore, use the Left or Right arrows to go through the modification history of your system files.
- After you’ve chosen the files and folders you wish to recover, follow these steps:
- To return files to their original place, left-click the green refresh button.
- To restore it to a new place, right-click the green restart button and choose to restore it.

Most acceptable Backup Options for Windows 11 in 2024
We’ve listed five effective methods for backing up files on Windows 11. These strategies are all fail-safe.
We’ll go through each procedure in detail and tell you which of the five is the best. Let’s get started without any further ado.
Here are five excellent backup techniques for Windows 11.
- EaseUS
- Backup and Restore in Windows
- File History in Windows 3
- Using the Cloud
- Copied and pasted manually
Any of the five techniques stated above may be used to back up your data, but we prefer the EaseUS Todo Backup Windows backup and restore service because of its simplicity.
It streamlines the data backup procedure. It’s a time-saving and valuable tool. It’s the most straightforward method for backing up data on Windows 11.
With EaseUS Todo Backup, back up your Windows 11 files.
The EaseUS Todo Backup program has a lot of handy functions. It enables you to do a slew of different things in addition to backing up your data.
Backing up is as painless as it gets with this program. Take a peek at some of its characteristics:
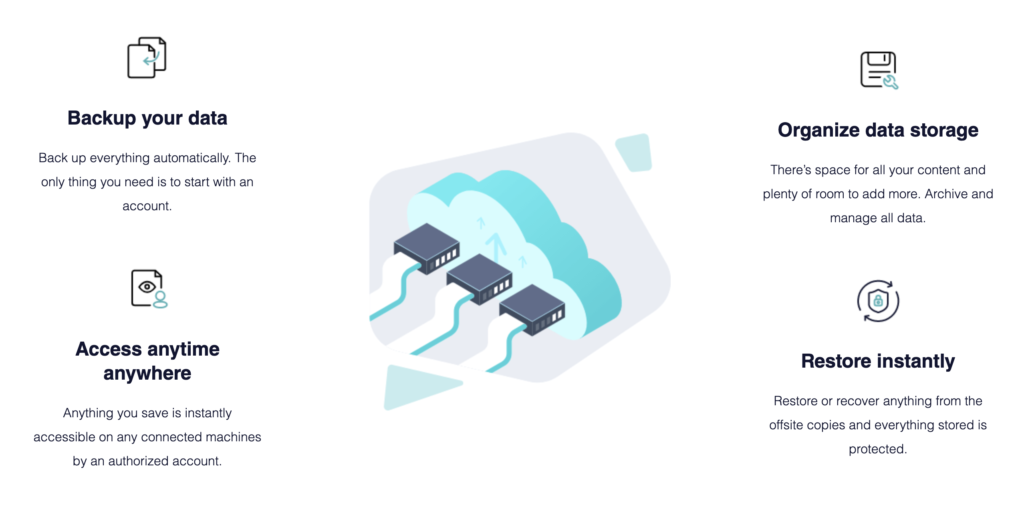
- Cloud-based backups
- Backup and recovery of emails
- A network drive for backups
- Backups may be done in three ways: full, incremental, and differential.
- Restore Universal
- Both options are to clone the hard drive and migrate the operating system to a solid-state drive (SSD) or hard disk drive (HDD).
- Intelligent backup
- Backing up and restoring a disk
- Management from afar
- Strategy for Image Reserve

This tool has all of these fantastic features. Download the EaseUS Todo Backup application to get started.
Choose the necessary functionality and install the program on your computer or laptop.
Choose the file option if you want to back up your Windows 11 files. You may use this program to back up your whole hard disk or selected files.
Merely choose the backup option you wish and leave the rest to the EaseUS Todo software.
The new Windows 11 has a centered Start menu and taskbar, rounded corner windows, unique themes, and colors that will make any Windows device stand out and many other significant improvements and a refreshing new graphical experience.