Is it possible to start windows on Mac without any flaws? Can we run Windows applications on MacBook? Or How to switch from Mac to Windows on startup?
These are specific questions for many MacBook users (including me a year ago). How can this be possible?

I am addicted to many games that run only on Windows PC, but after switching to Mac, it shows errors. So what is the alternative?
There are two ways to run Windows on the MacBook. The first one is Mac Boot Camp, and the other one is using Virtual software.
My recommendation: If you are looking for a shorter period, the in-built feature Boot Camp is a good choice, but go with virtualizing software in the long run.
How to Run Windows on MacBook using Boot Camp
Whether you are using MacBook Air or a Pro; the steps are the same for both.
Note: Back up all your essential data from your Mac safely; if you lose anything, it is possible to restore it.
1. Download Windows 10 Disc Image (ISO File)
The first step is downloading Windows 10 Disc Image from the official website.
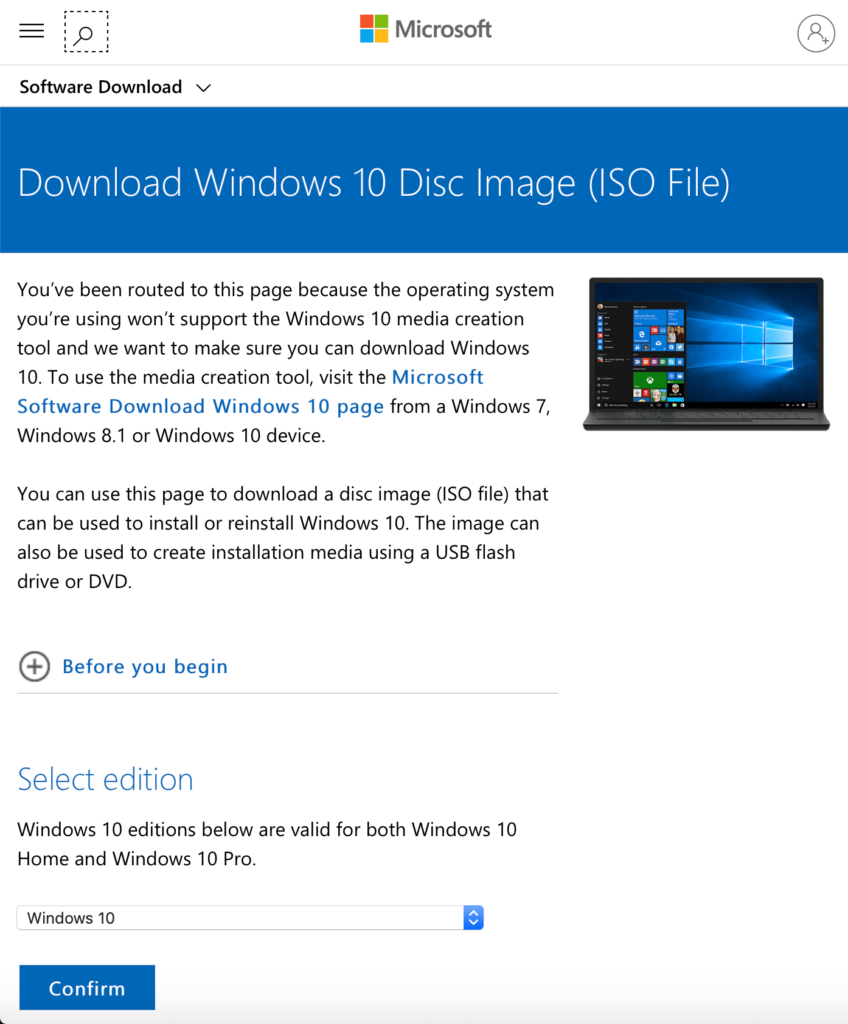
Here you have to choose the Windows edition and confirm it to download. Select your language if shown and click the Confirm button.
You are required to download 64-bit for Mac and click Save to download.
2. Launch Boot Camp Assistant on Mac
This is an in-built feature on your Mac; navigate to Finder> Applications> Utility folder. Once you have opened it, it detects the downloaded ISO File.
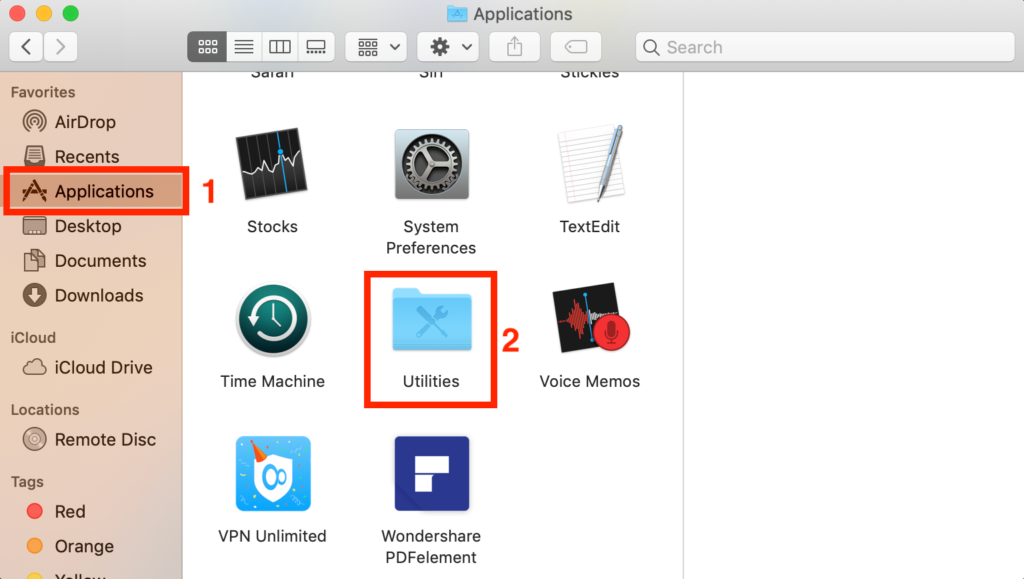
3. BOOTCAMP Partition
The next step is creating a partition on your Mac drive to install Windows.
This is the place where your Windows gets installed and operates from there. When you are done with the above step, which is BOOTCAMP Assistant, your Mac automatically restarts.
When it turns ON, it asks you for the location where you want to install Windows on Mac. Choose BOOTCAMP partition and click Format.
Sometimes, it automatically downloads windows to the specified area, don’t worry. This usually happens when you are not installing Windows using an external drive.
4. Time to Install Windows
You are all set to install Windows on your Mac
Happy? – Of Course!
Follow some simple steps to install Windows.
- Open the same ISO File you downloaded earlier, and click the Install button.
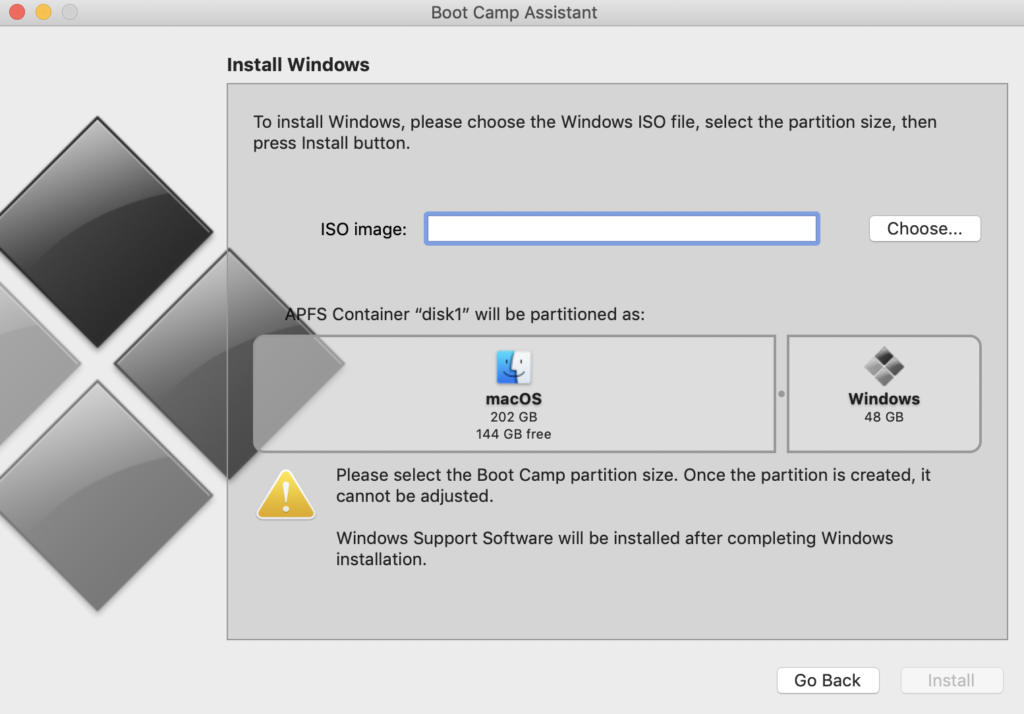
- Enter your login password to make changes on your Mac and click OK.
- There are different options on the Windows setup screen, such as choosing Language, entering the product key (not compulsory to have), and other follow-ups.
- Choose either Windows Home or Pro edition as per your requirement. We recommend you go with the Home edition.
- Click Drive 0 Partition X: BOOTCAMP. Click Next and let Windows be installed on Mac.
Once installation is completed, the Windows setup screen appears; choose to Customize option for smooth running and click Next without altering other options.
Add your Account and click Next to start using Windows on Mac. You can set the preferences later on as per your requirements.
5. Restart MacBook
To Start Windows on Mac, you need to restart your Macbook. By default, it starts with macOS bi. You must press and hold the option key (which acts as an alt key) on the Mac keyboard.
Choose the drive to boot you wish to open. Here choose the drive where Windows is installed.
Note: Here command key acts as Win and the option key act as the alt key.
You are all set to use Windows OS on Mac. Enjoy it.
How to switch macOS to Windows OS using Virtual Software
Here our choice is Parallels Desktop. It is an easy, fast, and reliable option to run Windows on Mac. And also not to forget, this is the safest option.
It doesn’t affect Mac’s performance and speed.
It does not require rebooting.
It works for Home and Business editions and is suitable for all levels of work. Currently, it comes in three editions.
- Parallels Desktop (for Home & Student use)
- Parallels Desktop Pro (for Developer, tester)
- Parallels Desktop Business (for work settings)
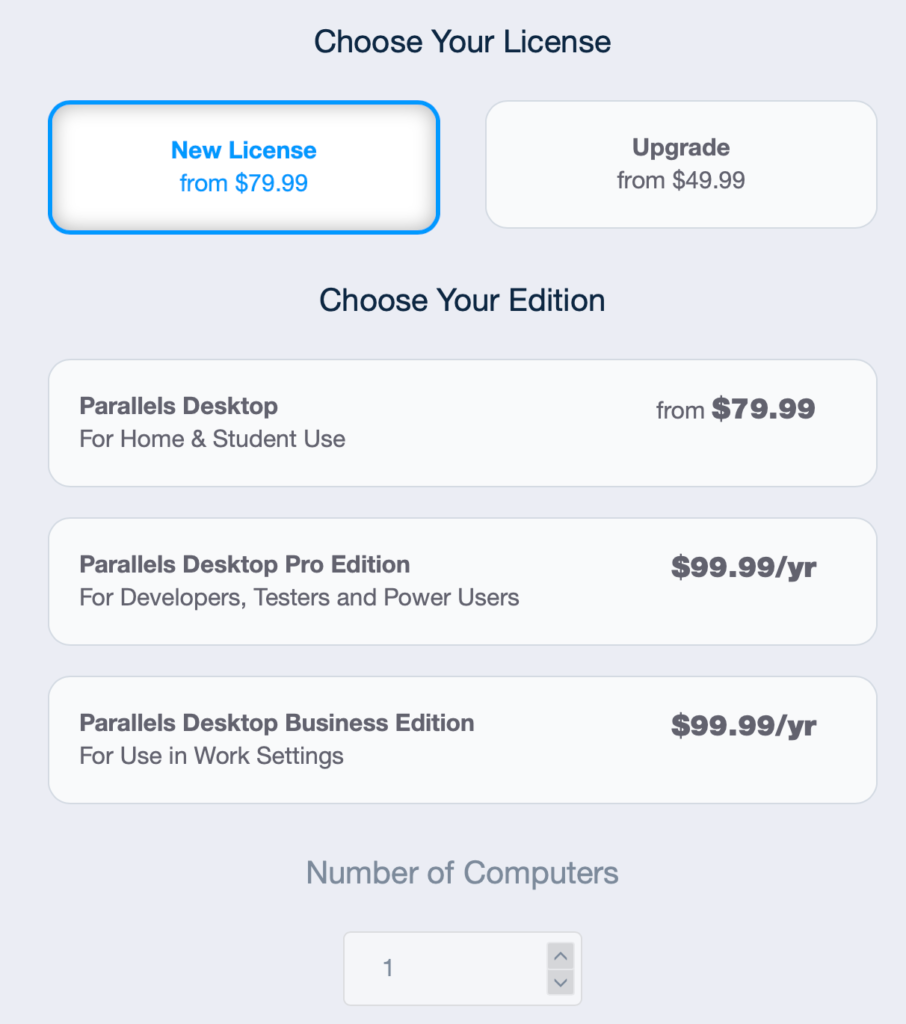
You can choose any plan as per your requirement and then follow some simple steps to continue with Parallels Desktop Virtual software.
Before starting, you must purchase Parallels Desktop, or you can try with their 14-day trial period for free.
Look for the ParallelsDesktop.dmg file downloaded once you have installed Parallels. If unable to locate it, press the Command-Space bar and enter the file name.
Click the Install button from there.
Follow the on-screen instruction while installing Parallels Desktop. You must confirm and accept the agreement and policy to finish the download.
Hold for some time until the installation is completed.
Once the installation is completed, it automatically redirects its page to download Windows; if you already have, click Skip; otherwise, click the Install Windows button.
When the installation gets completed, you require the Microsoft account to log in; if you don’t have one, create it.
No more steps!
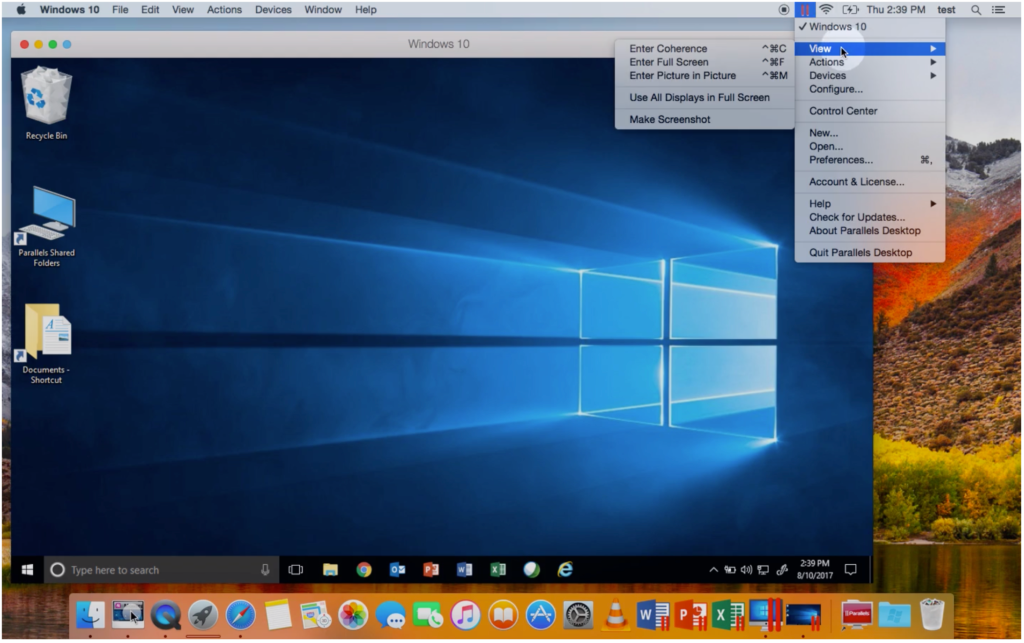
I think the second one is the far more accessible and quickest way to access Windows on Mac. If you still have questions, let us know. Our team helps you in every matter.
Final Comments
So far, we have seen the two best ways to start Windows on Mac, the first method is free, and the second is paid but more accessible, quick, and safe. You can also go with a 14-day free trial. It’s better to test first before making a purchase.
There is much other virtual software for Mac, but Parallels Desktop is better in every aspect. We have tested it and using it on our Mac.
For the latest tech tutorials and software deals, follow us on Facebook and Twitter.